How to Root Asus ROG Phone 3 Using Magisk
In this guide, I will show you how to root Asus ROG Phone 3 using magisk.
You will get tons of different methods from which you can attain fascinating rooting privileges for your device, though most time, you have to rely on your PC to get access ADB command. Here, you didn’t need this. Thus, let’s grasp a bit about the specs first.
Are you excited about a quick overview of the specification of the smartphone?
This smartphone launch in the Indian market on 22nd July 2020. Talking about camera sensor 64MP + 13MP + 5MP triple primary setup. Snapdragon 865 Plus processor powers Asus ROG Phone 3 with 8GB Ram and 128GB storage. The smartphone was coming with 6.59 inches (16.74 cm) 391 PPI, AMOLED. We are moving to battery performance is 6000 mAh, USB Type-C Port with Hyper Charging 4.0 before starting the guide; Let’s understand what is rooting?
What is Root?
In simple terms, the root is the core section where all the users and administer data are stored, “/” the slash symbol that refers to the root directory in computer language.
Getting access to those immersive core features is known as root access; usually, it is provided through a third-party app such as the Magisk to obtain superuser tweaks.
Nevertheless, you also need to be aware that this feature comes with its own twisted stories. Thus it’s become necessary to understand a few pros and cons traits as well.
Here are some Points to Remember while Rooting
- Ensure your smartphone bootloader has unlocked. You can also follow our guide to unlocking the bootloader on any Android phone.
- We recommend that your smartphone battery has been charged more than 40% because a lot of time required for the rooting procedure.
Advantage of Root Asus ROG Phone 3
The processing cores have their set limit, but you can make those lazy hardware work faster thanks to rooted device overclocking software in a hassle-free environment.
The system interface of the usual smartphone does consider a bit amount of useless bloatware apps; remove them through the android ecosystem with these privileges.
Disadvantage of Root Asus ROG Phone 3
Once you unhitch the system setting and enter into the root directory, you will lose the security barriers during the process; so the device becomes vulnerable to malware.
Bootloops are common when you root a smartphone, but there’s always a risk factor present on the table; the device can be brick after a single mistake in the procedure.
Magisk Update is not responsible for what happens to your phone. Do it at your own risk while carefully follow the guidelines and ask if you have any doubt regarding this matter. Download the correct TWRP according to your model.
How to Install TWRP Without Using PC
- Install the essential tools and TWRP custom recovery to move swiftly in future.
- Ensure to attain the latest version of the Magisk zip file using this guide, while the second thing you need to follow is the unlock bootloader section.
- You will need a secondary phone, and you have to purchase an OTG cable so that the secondary device can work as the PC and run basic commands.
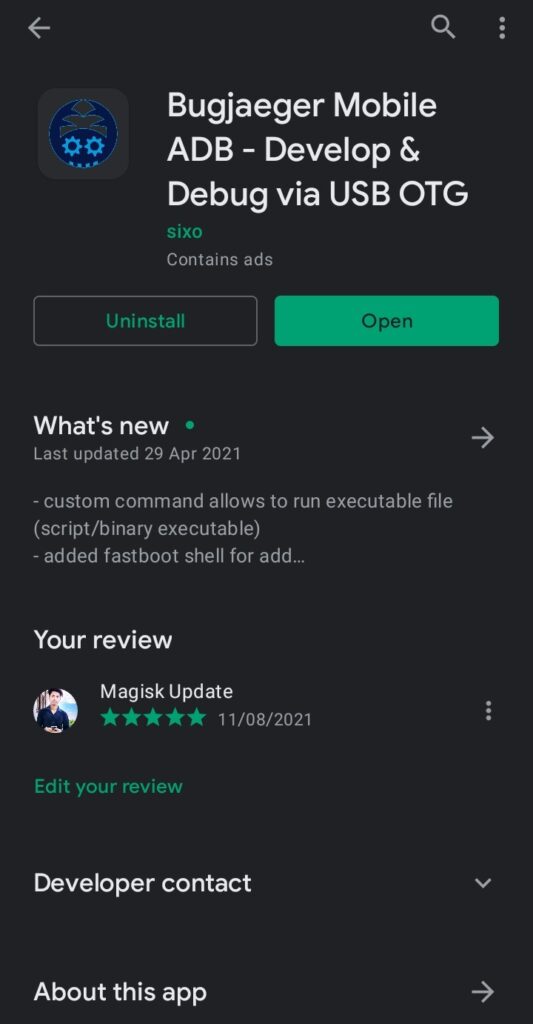
- Download the Bugjaeger Mobile ADB application into your Android phone.
- Make sure that the secondary device also has enabled USB debugging.
- Connect OTG into the secondary device while connecting the USB cable into the primary device. Plugin them accurately since everything depends on them.
- In the primary device, apply the Power + Volume down buttons combo once.
- From this combination, you will enter into the fastboot mode of your handset.
Note: I assume that you have download the respective TWRP file for your device!
- Head toward the Bugjaeger Mobile ADB apk and press on the flash option.
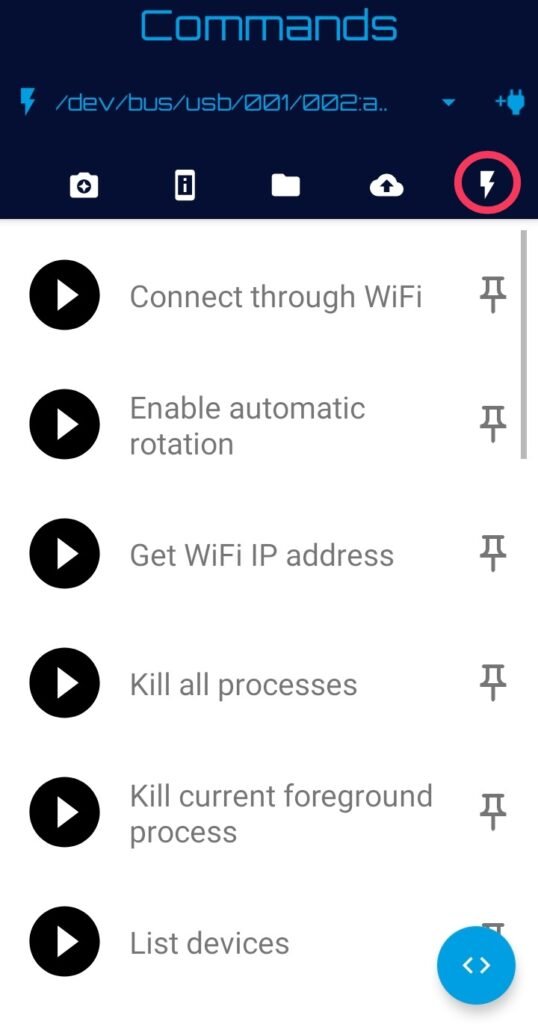
- You will notice the command prompt button in the below section of the screen.
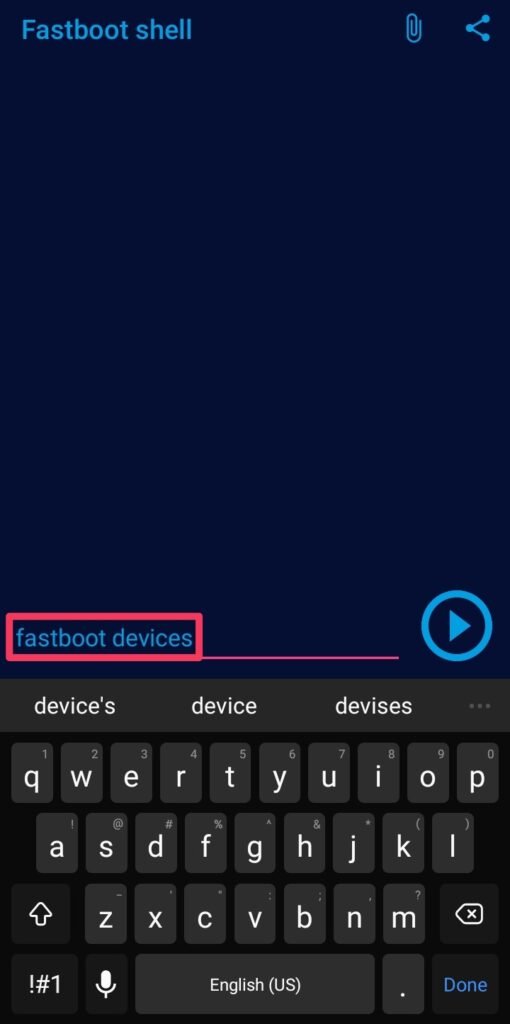
- Type command –fastboot devices – It will show that your device is connected.
- Type the second command –fastboot flash recovery– Make sure that you are entering the correct spelling, and after that, you have to attach the required file.
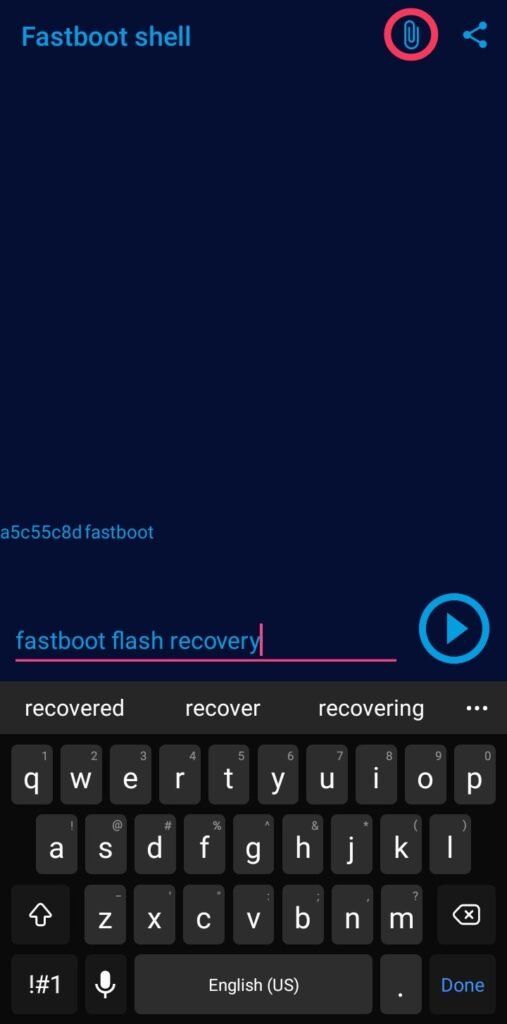
- Click on the attached file icon and navigate to the stored TWRP file location.
- Once you tap on the flashable file, it will appear in the command prompt.
- Now, press the play button to initialize the process of flashing the recovery.
- Once everything ends safe and sound—disconnected the primary device and boot into the custom recovery menu through the Volume Up + Power buttons.
How to Root Asus ROG Phone 3 Using Magisk
- You have likely obtained the flashable zip file from the above section, right?
- Boot the device into the recovery by the Power + Volume Up button combo.
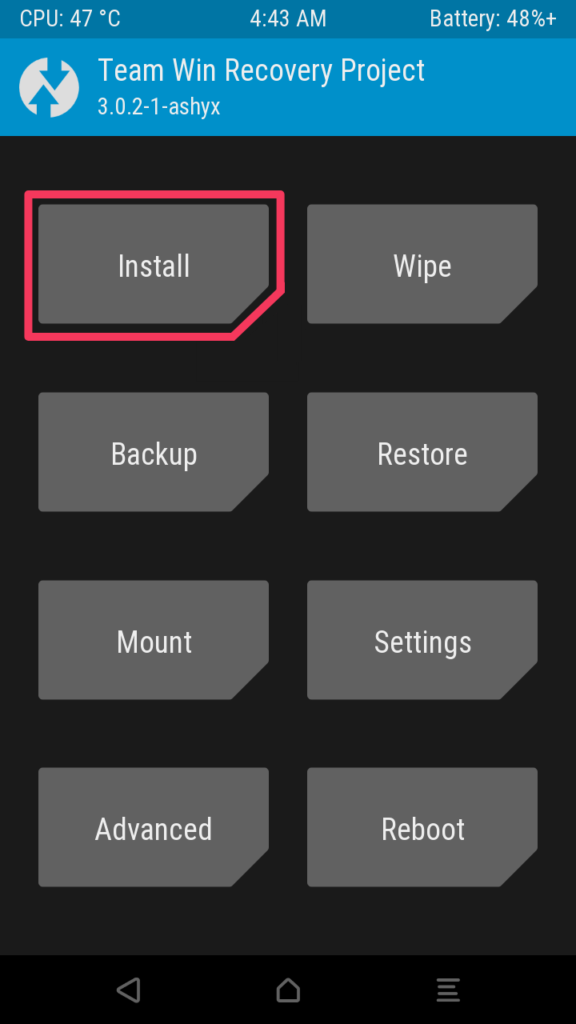
- Click on the Install section of the TWRP (Team Win Recovery Project) screen.
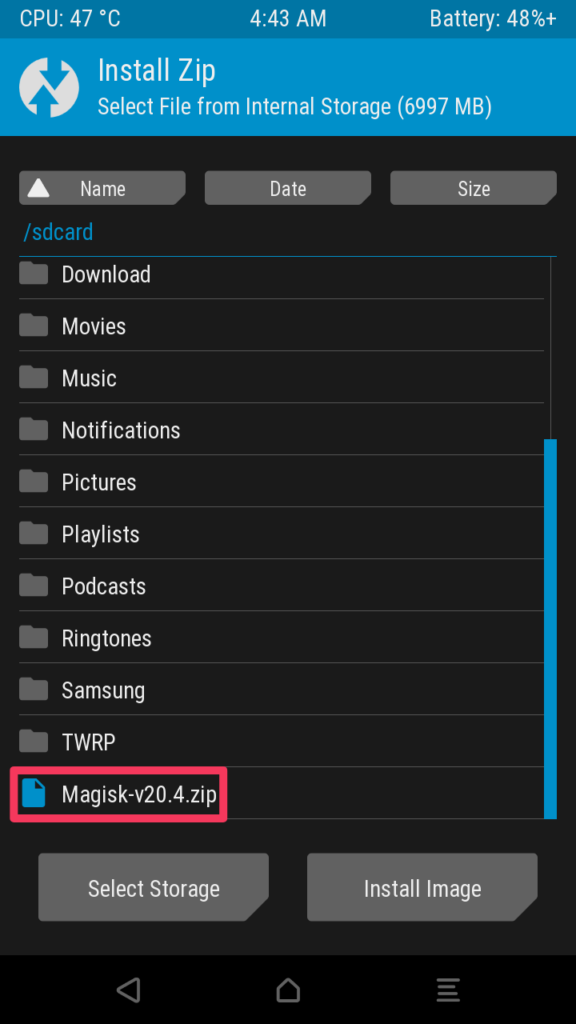
- Navigate to the Magisk zip folder and open the file into the internal storage.
- Once you will reach the file, tap on it while Select Storage starts to appear.
- Swipe right to complete the process. Afterward, reboot the device at last.
Ring the bells you have finally unlock those fascinating privileges for your phone!
Related Article:
Hurray, You have come across the endpoint! Why didn’t you give it a try to the vast world of custom ROMs? You can pick anything that suits your taste in the meanwhile.
Last but not least, if you meet any problem while following the guide or something is missing from the checklist, do let us know that thing in the following section precisely.