How to Root Moto E40 – Two Easy Methods!
Are you looking for a method to root Moto E40? If yes, you have come across the right place to receive a dedicated step-by-step guide to unleash those robust rooting traits.
In this article, we have wrapped everything from the beginning to the end, what tools you will need in the process, along with the precautions you should be aware of first.
Besides, if you are rooting your device for the first time, worry that not everything will go smoothly if you precisely follow the upcoming walkthrough to unlock unique traits.
There are various ways to root your phone. You can utilize a third-party KingRoot app that will directly render the access, which has an equal share of the pros and cons.
But if you want the best rooting experience, you should at least try to root your phone through magisk since it offers exciting features and applies privileges systemless.
And in this post, we have covered the magisk method. There’s no need to worry about it, but first, let’s compile what root is to grasp the whole picture of what we are doing.
What is Root?
The root is the introductory section of the system partition that handles different level directories. Each of them works on something to add more value to the UI elements.
In the case of roots, the primary aim is to gain administer-directory access. That’s why many users opt to root devices to unlock the system parts, which are usually blocked.
You can accomplish different things, apply customization, change UI skin, update OS, etc. At the same time, you need to be aware of the pros and cons of rooting devices.
Pre-Requisites
- Ensure your smartphone bootloader has unlocked. You can also follow our guide to unlocking the bootloader on any Motorola phone.
- You can not do anything about the data stored inside the internal storage once the rooting process starts. Please, take backup data before.
Advantages of Root Moto E40
The most tempering thing about rooting is that you can apply desired custom traits without worrying about the system limitation or boundaries with custom ROM’s help.
Apart from this, many users prefer to utilize the most advanced feature to level up the performance aspect of the phone by overclocking and underclocking for battery life.
Disadvantages of Root Moto E40
There’s no denying rooting comes with its flaws. The process unlocks the bootloader that considers the warranty claim violation you suppose to get in case of damage.
You have to expect overheating issues if you flash incompatible ROM, and as a side-effect, bootloop problems can also occur, but the worst case is that it brick the device.
Magisk Update is not responsible for what happens to your phone. Do it at your own risk while carefully following the guidelines and ask if you have any doubt regarding this matter. Download the correct TWRP according to your model.
How to Install TWRP Without Using PC
- Install the essential tools and TWRP custom recovery to move swiftly in future.
- Ensure to attain the latest version of the Magisk zip file using this guide, while the second thing you need to follow is the unlock bootloader section.
- You will need a secondary phone, and you have to purchase an OTG cable so that the secondary device can work as the PC and run basic commands.
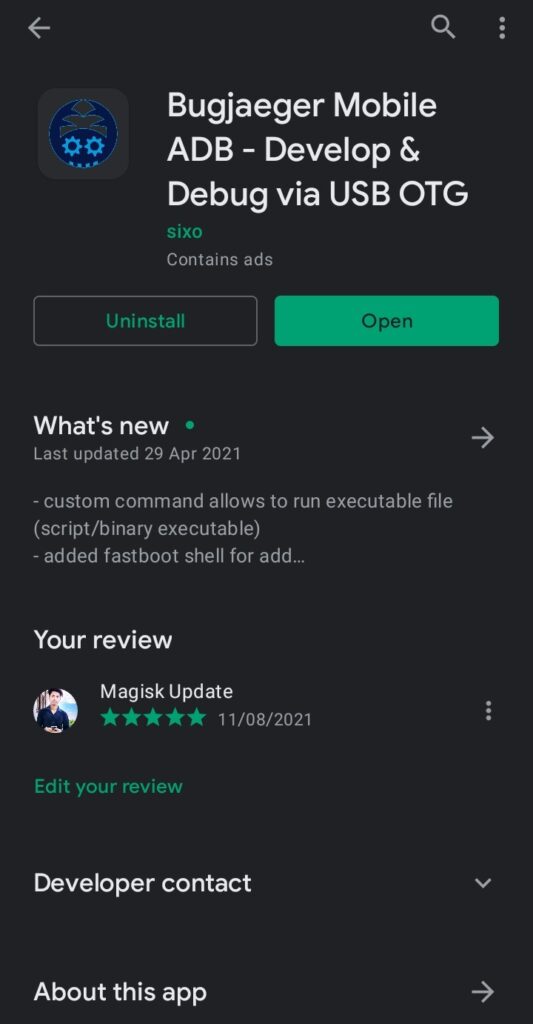
- Download and install the Bugjaeger ADB application into your Android phone.
- Make sure that the secondary device also has enabled USB debugging.
- Connect OTG into the secondary device while connecting the USB cable to the primary device. Plugin them accurately since everything depends on them.
- In the primary device, apply the Power + Volume down buttons combo once.
- From this combination, you will enter your handset’s fastboot mode.
Note: I assume that you have downloaded the TWRP recovery for your device!
- Head toward the Bugjaeger ADB application and press on the flash option.
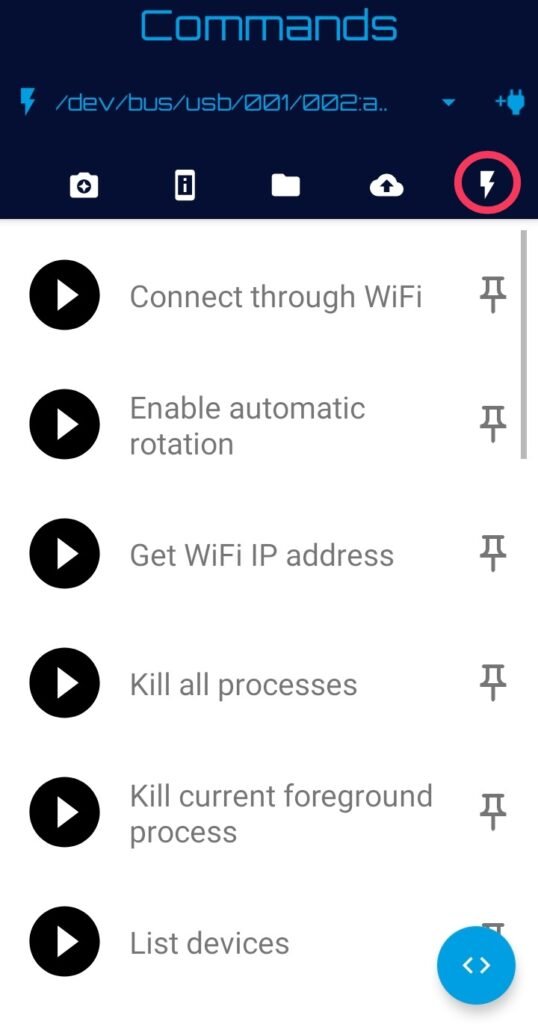
- You will notice the command prompt button in the below section of the screen.
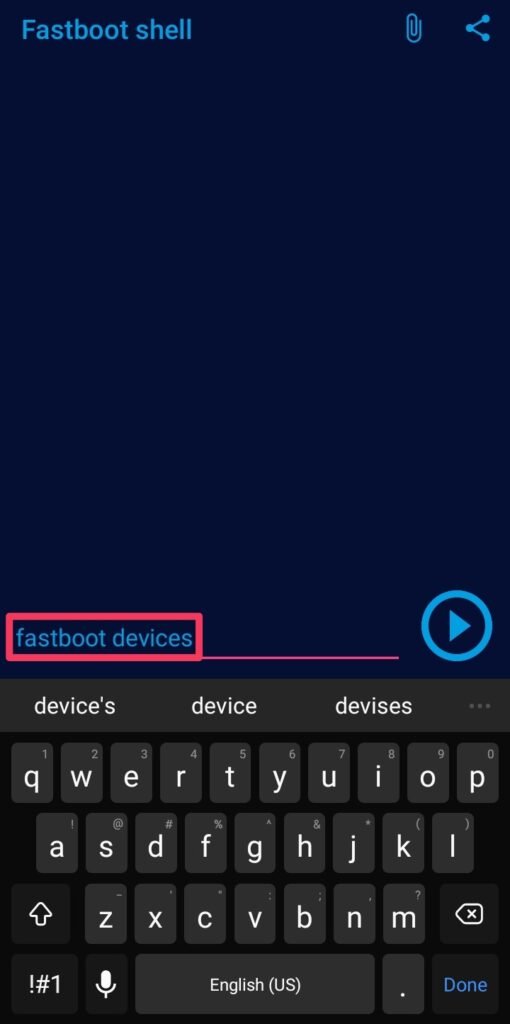
- Type command –fastboot devices – It will show that your device is connected.
- Type the second command –fastboot flash recovery– Make sure that you are entering the correct spelling, and after that, you have to attach the required file.
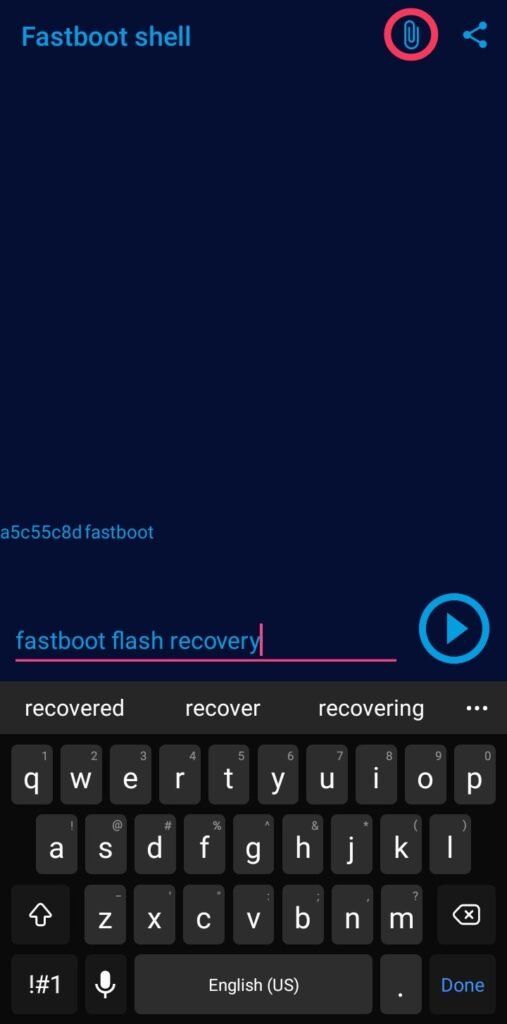
- Click on the attached file icon and navigate to the stored TWRP file location.
- Once you tap on the flashable file, it will appear in the command prompt.
- Now, press the play button to initialize the process of flashing the recovery.
- Once everything ends safe and sound—disconnect the primary device and boot into the custom recovery mode through the Volume Up + Power buttons.
Method#1: Root Moto E40 Using Magisk
- You have likely obtained the flashable zip file from the above section, right?
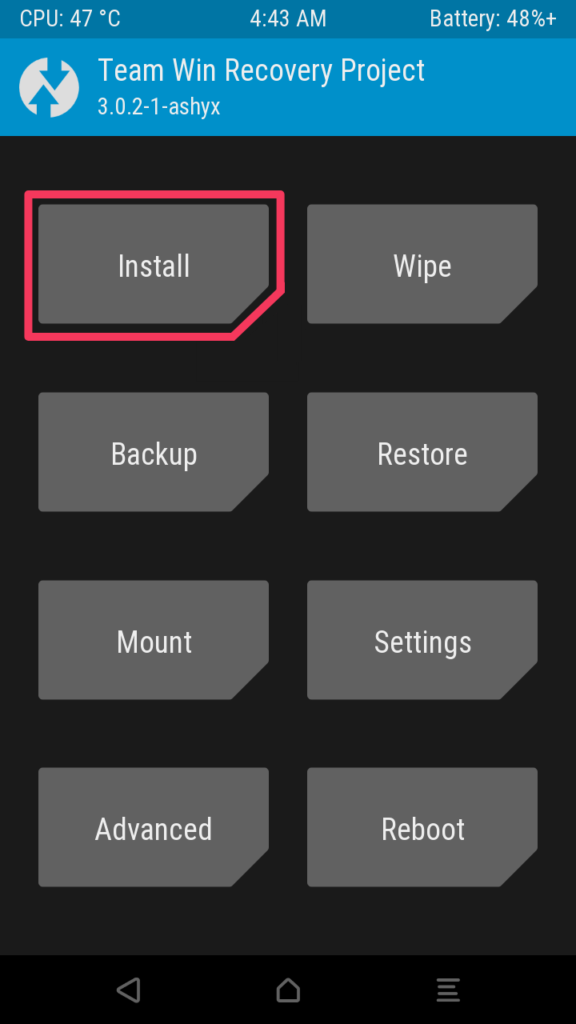
- Click on the Install section of the TWRP (Team Win Recovery Project) screen.
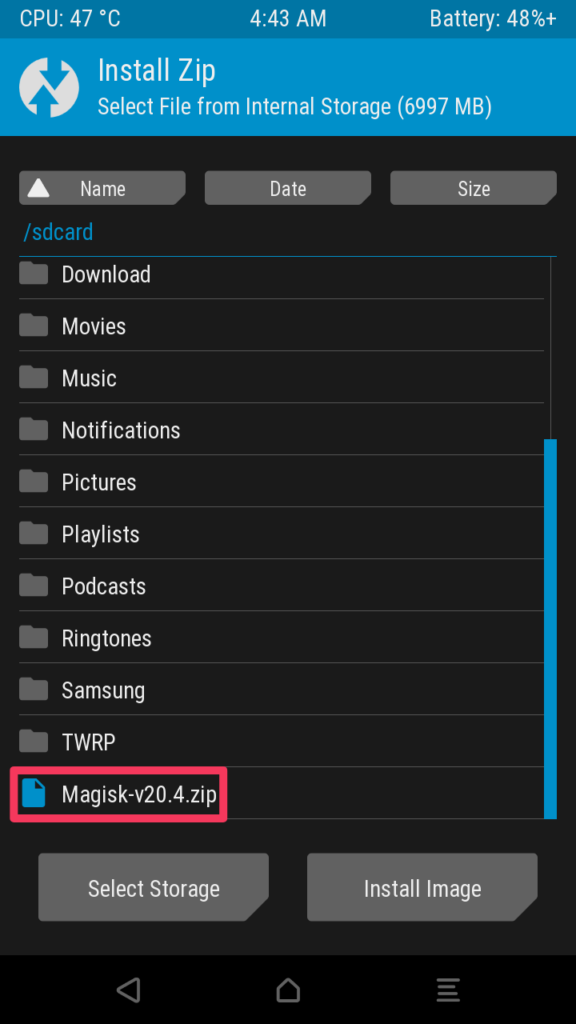
- Navigate to the Magisk zip folder and open the file into the internal storage.
- Once you will reach the file, tap on it while select storage starts to appear.
- Swipe right to complete the process. Afterward, reboot the device at last.
- Congratulation, you have finally unlocked those fascinating root privileges.
Method#2: Root Moto E40 Using KingRoot
If you are looking for a method that root Android phones without a PC, the KingRoot is the solution for that, you didn’t need an additional resource package to start.
- First of all, get the latest version of the KingRoot apk.
- Download and install on the KingRoot apk over your phone.
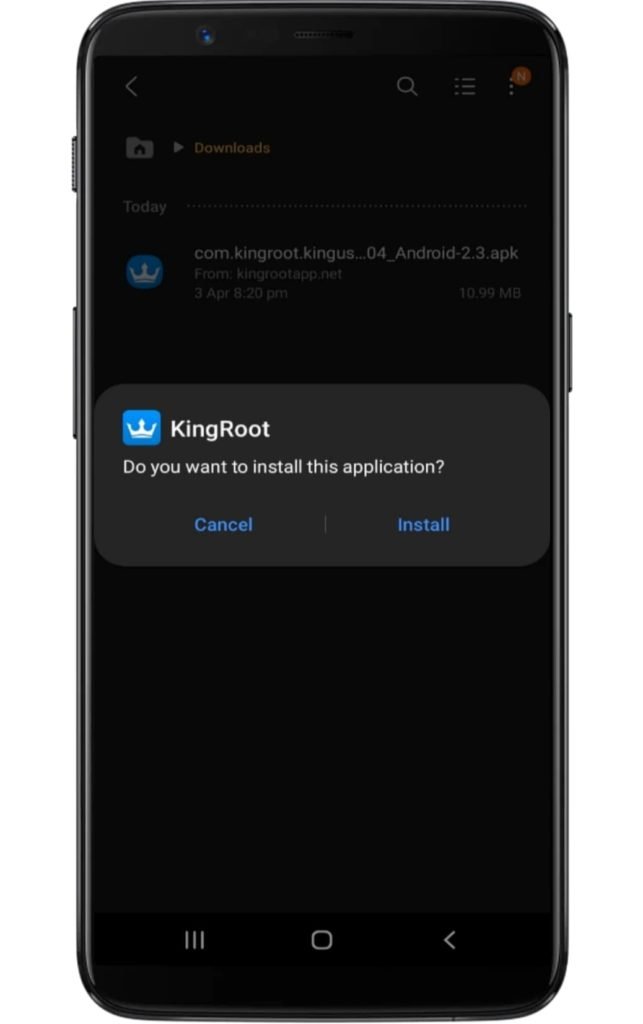
- Make sure you have enabled the unknown source option.
- Access the application and tap on the “Try Root” button.
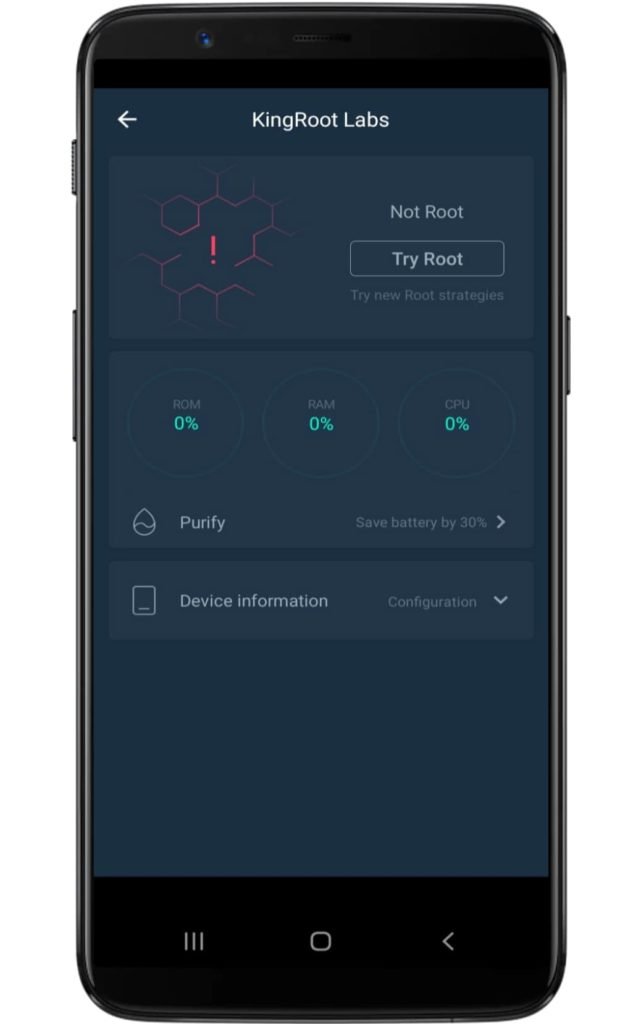
- Now several booting starts to take place, so don’t worry!
- Lastly, your device will be successfully rooted.
Related Article:
I hope that you have flashed the rooting feature properly. Now that you have achieved those impressive aesthetic features, why don’t you flash ROM to start the journey?
Try with different UI themes, and construct something innovative with creativity. If you come across any problems, do let us know. Meanwhile, also express your experience!