
How to Root Redmi Note 9 Pro Without PC
In your personal experience, you might see bloatware in the interface layer, isn’t that right? If you want to throw them away entirely, you have to root Redmi Note 9 Pro.
Now you are thinking about how you will perform that, in that case, you didn’t have to think about too much because we have covered everything in the following guide.
The deeper you go, the better you understand the process and won’t face any problems later; thus, let’s head toward the primary specs section to commence the procedure.
This smartphone launched in the Indian market on 17th March 2020. Talking about camera sensor 48MP + 8MP + 5MP + 2MP quad primary setup. Snapdragon 720G processor power redmi note 9 pro with 4GB Ram and 64GB storage. The smartphone was coming— with 6.67 inches (16.94 cm) 395 PPI, IPS LCD. We are moving to battery performance is 5020 mAh, USB Type-C Port with Fast Charging before starting the guide. Let’s understand what root is!
What is Root?
The rooting access is a pathway to uncover the true potential of any regular phone. It takes the help of a command prompt that changes some system partition settings.
Usually, it breaks through the superficial system partition layer with codes, and there are several methods available on the internet, but the best would be the Magisk app.
You can cause rumble with features like boost performance, Custom ROMs, removing bloatware, increase storage limits; however, you need to know the pros and cons.
Here are some Points to Remember while Rooting
- Ensure your smartphone bootloader has unlocked. You can also follow our guide to unlocking the bootloader on any Xiaomi phone.
- We recommend that your smartphone battery has been charged more than 40% because a lot of time required for the rooting procedure.
Advantages of Root Redmi Note 9 Pro
Sometimes it’s all about dressing the interface setup with elegant ROMs and creates a personalized experience ecosystem that works according to your wishful command.
If you desire to examine the smartphone deepest section, you can quickly access the administer directory. Which means you can control the entire device with no trouble.
Disadvantages of Root Redmi Note 9 Pro
There’s no doubt that most smartphone makers discourage rooting practices, while the harsh reality is way darker than you expect as you will lose warranty privileges.
In some extremely unusual cases, users have sometimes noticed that their device’s battery draining faster, and drastic overheating issues start to appear on the surface.
Magisk Update is not responsible for what happens to your phone. Do it at your own risk while carefully follow the guidelines and ask if you have any doubt regarding this matter. Download the correct TWRP according to your model.
How to Install TWRP Without Using PC
- Install the essential tools and TWRP custom recovery to move swiftly in future.
- Ensure to attain the latest version of the Magisk zip file using this guide, while the second thing you need to follow is the unlock bootloader section.
- You will need a secondary phone, and you have to purchase an OTG cable so that the secondary device can work as the PC and run basic commands.
- Download and install the Bugjaeger ADB application into your Android phone.
- Make sure that the secondary device also has enabled USB debugging.
- Connect OTG into the secondary device while connecting the USB cable into the primary device. Plugin them accurately since everything depends on them.
- In the primary device, apply the Power + Volume down buttons combo once.
- From this combination, you will enter into the fastboot mode of your handset.
Note: I assume that you have download the respective TWRP file for your device!
- Head toward the Bugjaeger ADB application and press on the flash option.
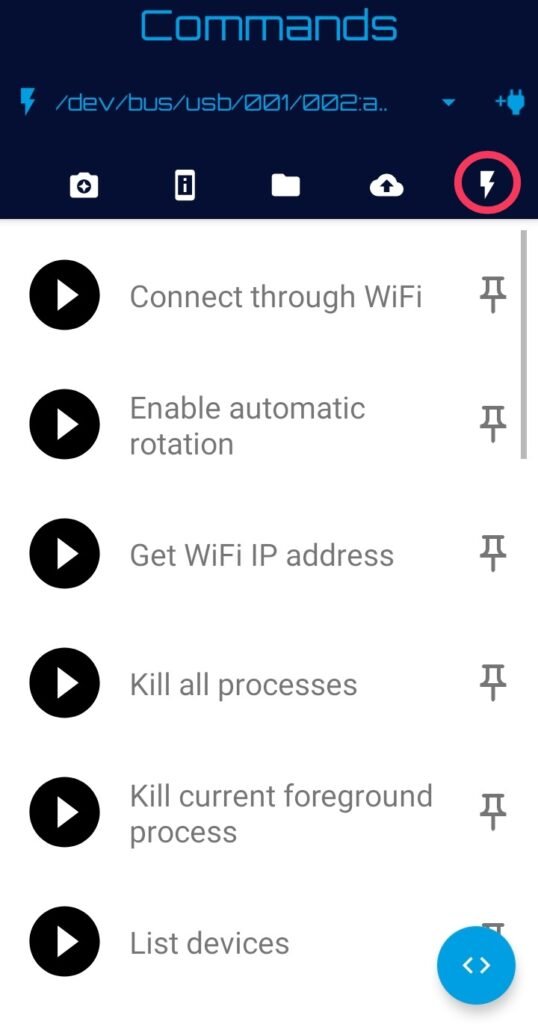
- You will notice the command prompt button in the below section of the screen.
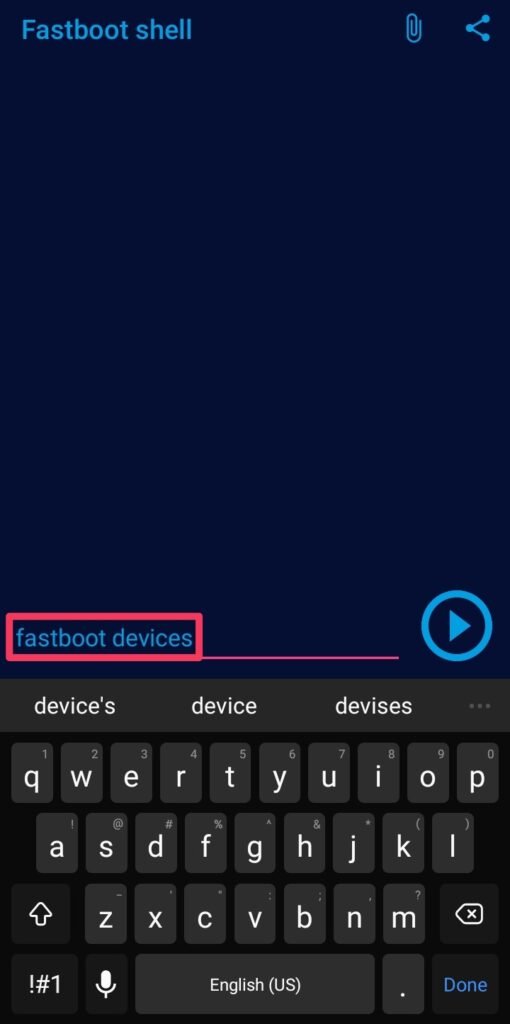
- Type command –fastboot devices – It will show that your device is connected.
- Type the second command –fastboot flash recovery– Make sure that you are entering the correct spelling, and after that, you have to attach the required file.
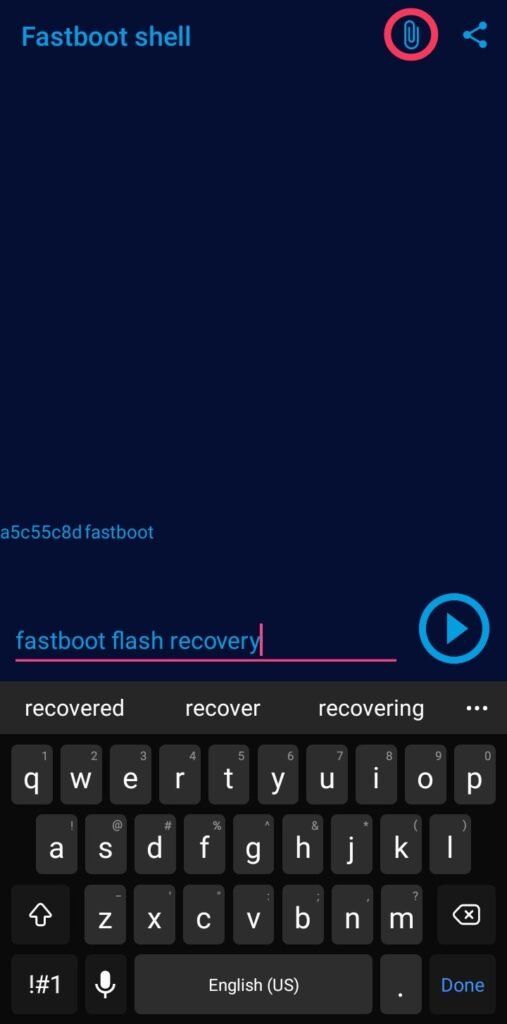
- Click on the attached file icon and navigate to the stored TWRP file location.
- Once you tap on the flashable file, it will appear in the command prompt.
- Now, press the play button to initialize the process of flashing the recovery.
- Once everything ends safe and sound—disconnected the primary device and boot into the custom recovery mode through the Volume Up + Power buttons.
How to Root Redmi Note 9 Pro Using Magisk
- You have likely obtained the flashable zip file from the above section, right?
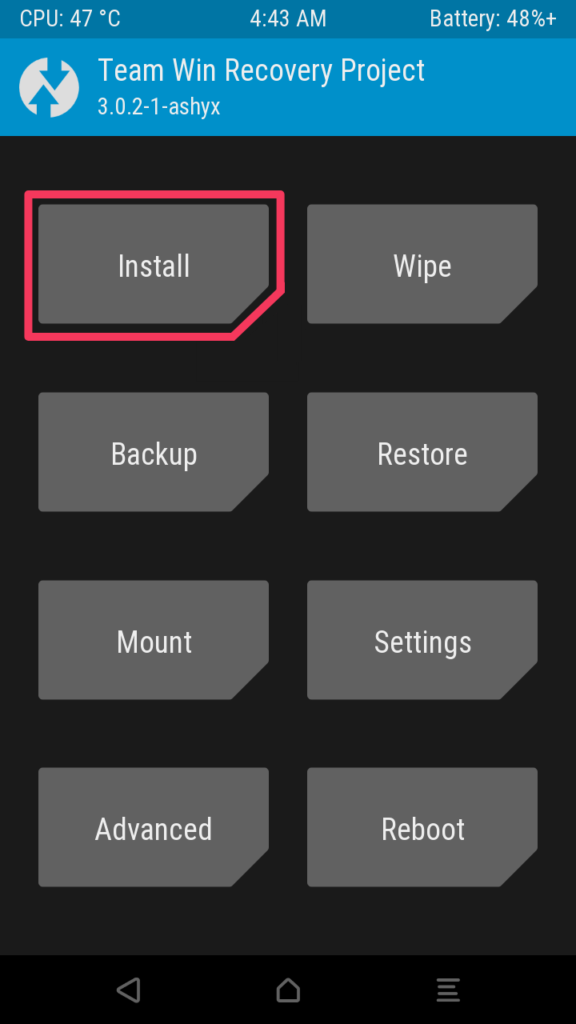
- Click on the Install section of the TWRP (Team Win Recovery Project) screen.
- Navigate to the Magisk zip folder and open the file into the internal storage.
- Once you will reach the file, tap on it while select storage starts to appear.
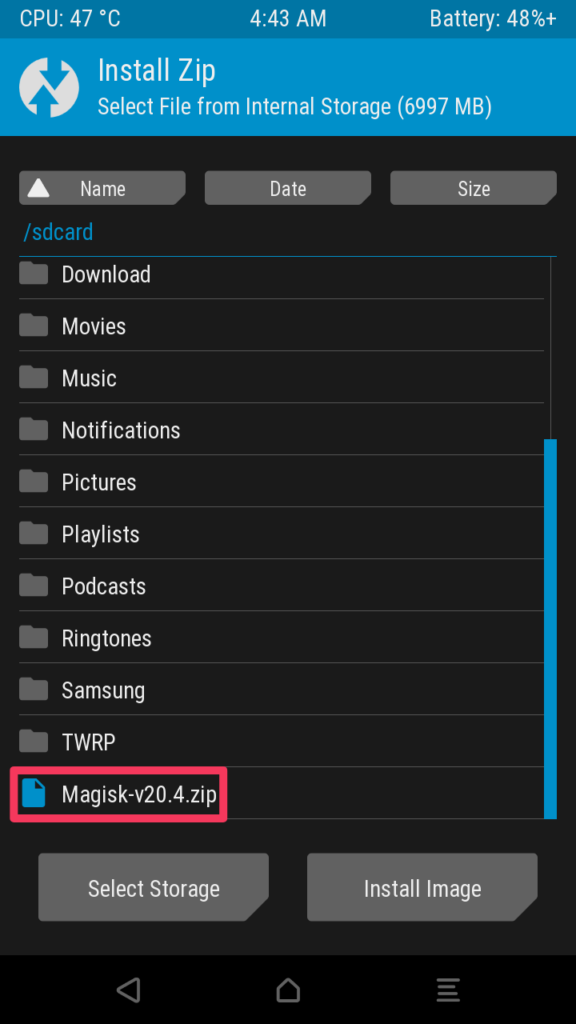
- Swipe right to complete the process. Afterward, reboot the device at last.
- Congratulation, you have finally unlocked those fascinating root privileges.
Related Article:
You have reached the key to unlock the true power of your device’s throne. Now that you have a customized setting option, test out different applications at the same time.
On a side note, always remember the risks factor involved in the root process and its aftermath, so it would be wise to clear your doubts about not taking the wrong step.
Nice article
thank you for your valuable comment
Is this twrp work as it not available anywhere where did you get it
Yes it works for Indian version or globally redmi note 9s, we got these twrp from xda developers
Does twrp work on redmi note 9 pro???
Yes, it Works only redmi note 9 Pro Indian version, but If your device global version than comment me my team provide you link by email…
My device global version
Pls help me
okay, you can download the recovery for redmi note 9 pro global version from the updated link
Plz call me and help I
what about note 9 pro max
Redmi note 9 pro max are globally launched by redmi note 9 pro, but I did not found recovery for global version. using my recovery only working Indian version.
okay, I found recovery for working on all version, recently update link in our post
I need TWRP for Redmi Note 9 pro Max Indian Version
okay, thanks for visit my blog you can download from here. make firstly extract the .rar file then copy recovery.img then paste in platform tool folder
Thank you, I’ve just been searching for info about this subject for a while and yours
is the greatest I have came upon so far. However, what about the
bottom line? Are you certain about the supply?
My brother recommended I might like this web site.
He was entirely right. This post truly made my day.
You can not imagine just how much time I had spent for this info! Thanks!
thanks for your valuable comment.
This is a topic which is near to my heart… Take care!
Where are your contact details though?
You can contact me by email..!!