How to Root Moto E6 Plus – Three Easy Methods!
Are you looking to root moto e6 plus? If yes, then you are at the right place.
You are stuck with the usual settings format; there are loads of limitations integrated into the interface, but if you want to get rid of the restriction and view the true powers of your smartphone. Then, you need root privileges. For that, let’s first visit the specs.
Are you excited about a quick overview of the specification of the smartphone?
This smartphone launched in the Indian market on 5th September 2019. Talking about the camera sensor 13MP + 2MP dual primary camera setup. Helio P22 processor powers moto e6 plus with 4GB Ram and 64GB storage. The smartphone was coming with 6.1 inches (15.49 cm) 282 PPI, IPS LCD. We are moving to battery performance is 3000 mAh with Micro-USB Port before starting the guide. Let’s understand what root is!
What is Root?
The root directory holds one of the essential internal sections in the smartphone; it’s more like the storage unit in which the user’s data and administer settings are stored.
Yet, on the other hand, the process of unlocking the root access is an entirely different thing, where you have to open the bootloader and unlock the other setting to grab it.
However, the process also includes its own risk and flaws, while the risk factor won’t justify it unless you understand the core concept of the pros and cons of the rooting.
Pre-Requisites
- Ensure your smartphone bootloader has unlocked. You can also follow our guide to unlocking the bootloader on any Motorola phone.
- You can not do anything about the data stored inside the internal storage once the rooting process starts. Please, take backup data before.
Advantages of Root Moto E6 Plus
You can dive into the endless customization library, which helps you create to change the interface setting and gives you the power to boost the core performance aspect.
Besides this, you can quickly find root applications and software that will enhance the battery life, but the best prick would be that you can throw away useless bloatware.
Disadvantages of Root Moto E6 Plus
As I have said earlier, there is also minimal risk factors such as your device might stick into the bootloop. Even worst would be that the device will become complete brick.
Apart from this, you will also lose the security barrier while following the process and loss warranty privileges since rooting the system setting violates companies’ policies.
How to Root Moto E6 Plus?
We are at the correct place and if you are looking for a way to root your device, you can apply the following two methods to apply those robust features. But at the same time, there are flaws as well as benefits of each process, so pick accordingly.
Flashable-zip file
If you are looking for a more success rate with stable results, we will recommend you to proceed with the flashing zip file rooting procedure. Most time, it’s secure and you can easily unroot the phone with the same methods. But, it’s slightly difficult.
The process is used by the Magisk and SuperSU, while the custom recovery is required as you have to flash these zip files and unlock the rooting powers.
Third-party app
The third-party apps method optimized the time limits and provide those astounding functions to your phone in a few clicks here and there. Besides, it’s quite popular with the newbies due to its ease of use and they didn’t need additional resources either.
Disclaimer – Magiskupdate is not responsible for any root problem. You have to take the risk. If you are not willing to proceed forward, it’s the right time to stop.
Method#1: Root Moto E6 Plus Using Magisk
Magisk is one of the most popular ways to root your smartphone. Although, the only downside of this process is that it’s slightly time-consuming. However, the systemless rooting factor makes this procedure a secure and safe option for a newbie.
Note: You will need to unlock bootloader and install custom recovery for this method. On the same note, you will also require the stock firmware file.
- First of all, you have to download the magisk application.
- Once you have downloaded the file, go to the download folder.
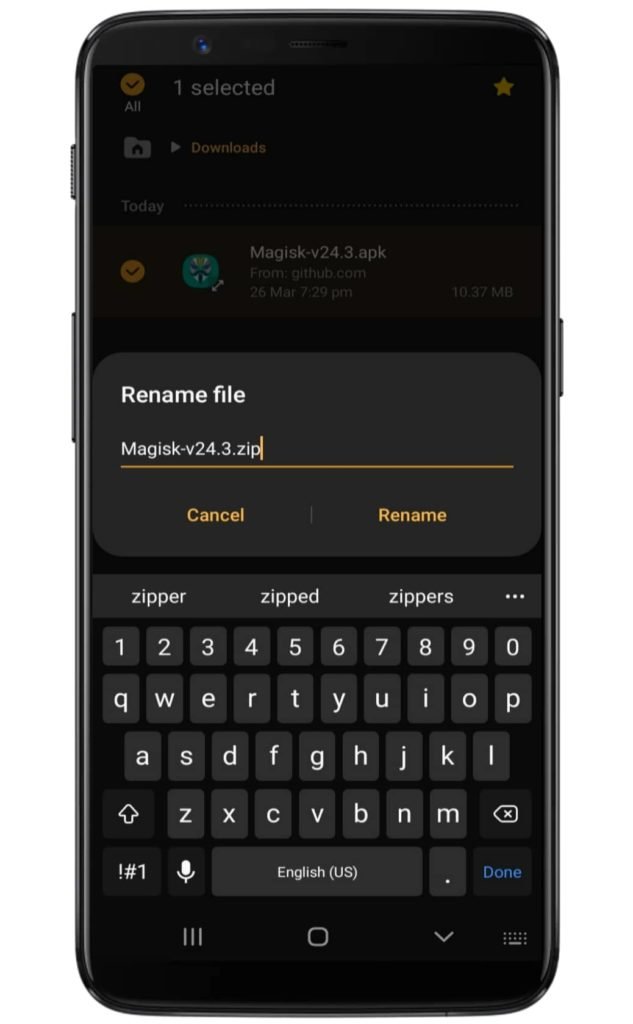
- Go to the file manager and rename magisk.apk to magisk.zip.
- Now, you have to boot into the TWRP recovery so turn off phone.
- Following this, press the Volume Down and Power button combo.
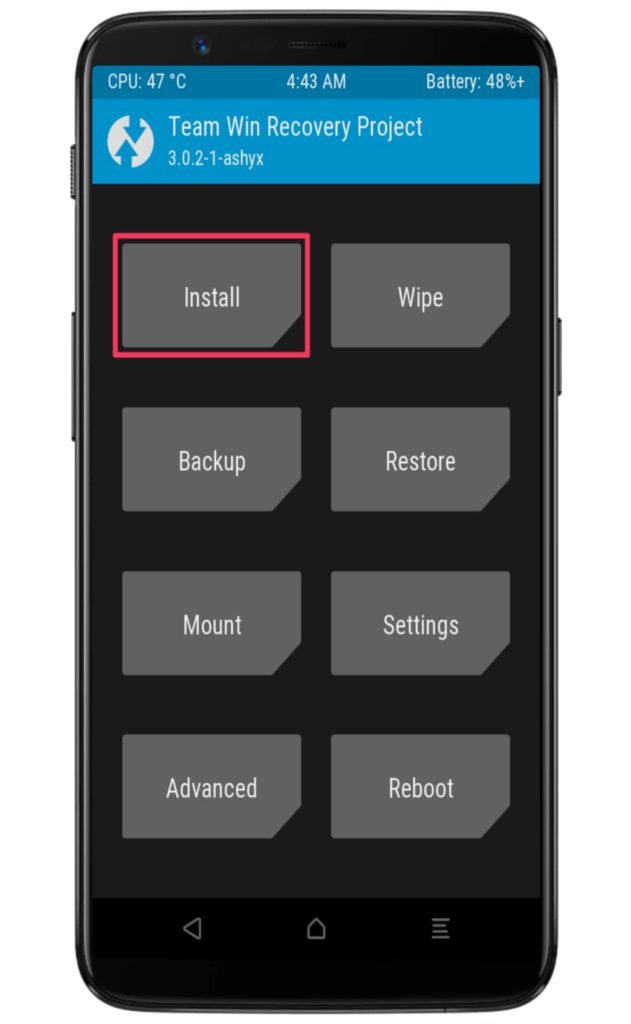
- Inside the TWRP home screen, tap on the Install button first.
- Navigate to the magisk.zip file location and swipe left to flash.
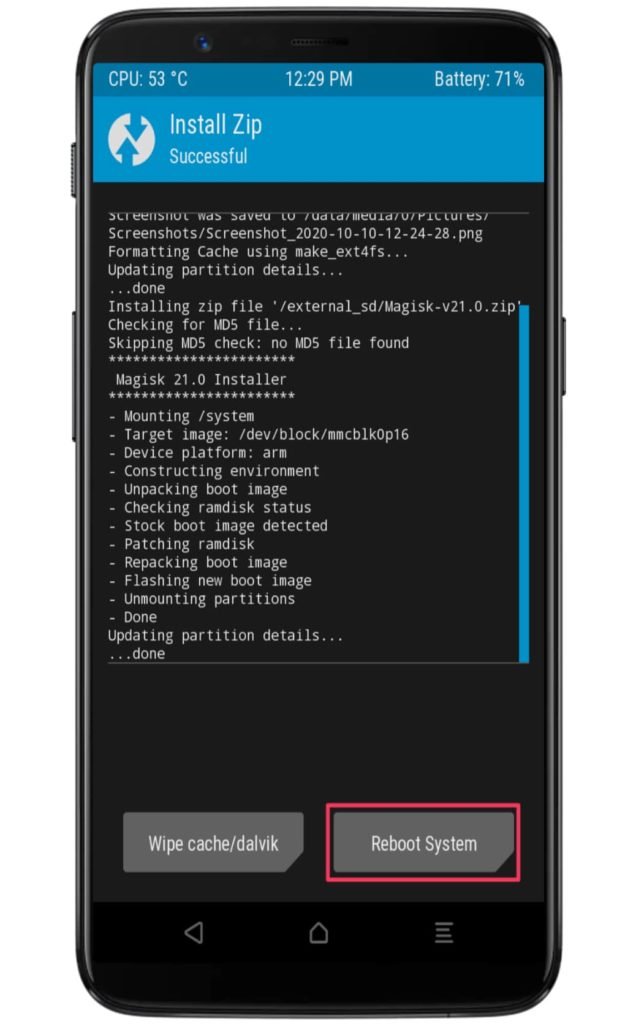
- Once the process ends, you can click on the reboot system option.
- You will see that the magisk app is installed inside the app drawer.
- Tap on the magisk app to complete the installation process.
Method#2: Root Moto E6 Plus Using KingRoot
If you are looking for a method that root Android phones without a PC, the KingRoot is the solution for that, you didn’t need an additional resource package to start.
- First of all, get the latest version of the KingRoot apk.
- Download and install on the KingRoot apk over your phone.
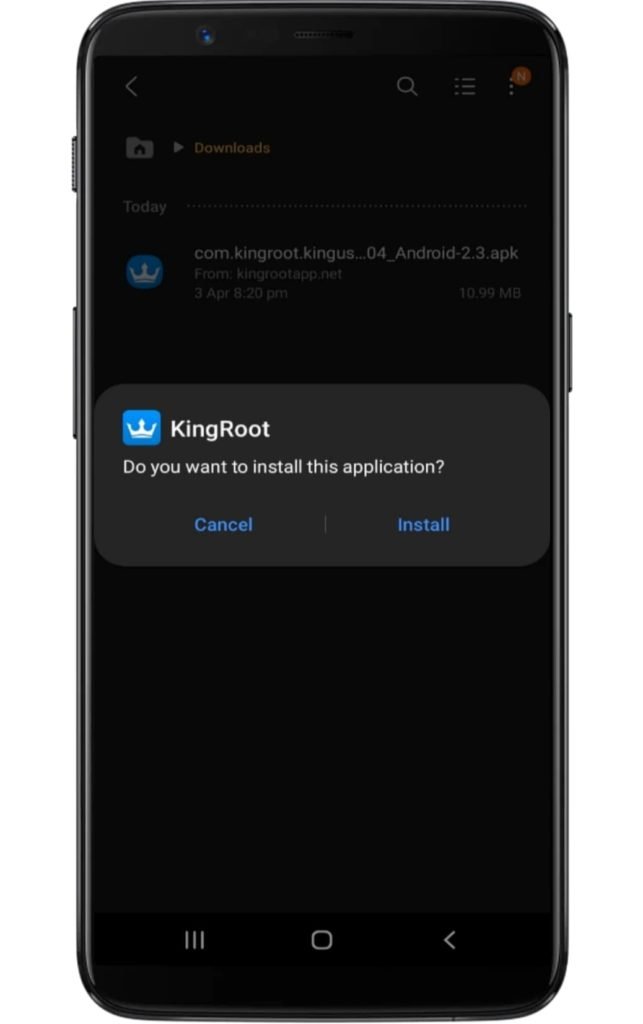
- Make sure you have enabled the unknown source option.
- Access the application and tap on the “Try Root” button.
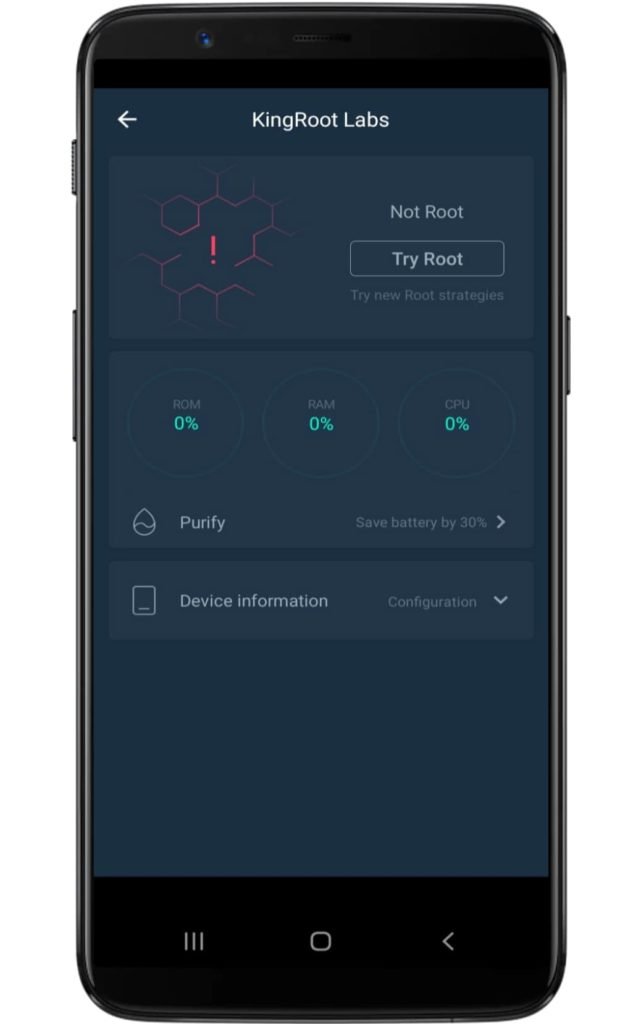
- Now several booting starts to take place, so don’t worry!
- Lastly, your device will be successfully rooted.
Conclusion
Eventually, you have to unlock the fabulous system settings that will unfold impressive custom ROMs while getting features traits at your palm in pretty hassle-free manners.
Besides this, there are other things that you can accomplish, but if something doesn’t work out in your case, all you need to do is travel the following section to get answers.