How to Root Redmi 9A Without PC [Working]
Are you looking for a method to unlock the untapped potential of your smartphone? If Yes, you have made the right choice to come here, here you will obtain root redmi 9a.
In this post, we have covered everything from scratch that’s essential to attaining root access privileges without changing the system settings files in a pretty secure manner.
Alongside this, you can take one step further and read this post thoroughly to grasp the techie knowledge. As for the initial step, let’s head toward the primary specs traits.
This smartphone launched in the Indian market on 6th July 2020. Talking about camera sensor 13MP primary setup. MediaTek Helio G25 processor power redmi 9a with 2GB Ram and 16GB storage. The smartphone was coming— with 6.53 inches (16.59 cm) 269 PPI, IPS LCD. We are moving to battery performance is 5000 mAh, with Micro-USB Port before starting the guide. Let’s understand what root is!
What is Root?
You can say that root is the deepest part of your smartphone that grasp the potential of administering privileges that you usually won’t observe in your day-to-day usage.
With those fascinating privileges, you can commence massive changes in the system visuals and internal setting without any problem, plus there’s no limit to that as well.
Although there are few flaws when you install those exciting and robust features, so let’s know about both sides of the coin. To didn’t face any trouble in the future course.
Here are some Points to Remember while Rooting
- Ensure your smartphone bootloader has unlocked. You can also follow our guide to unlocking the bootloader on any Xiaomi phone.
- You can not do anything about the data stored inside the internal storage once the rooting process starts. Please, take backup data before.
Advantage of Root Redmi 9A
The majority of users install rooting privileges to gets their hands on the impressively wide range of custom ROMs that can improve several sections of the regular phone.
You can experience the magnificent feature of different custom interfaces by flashing system files and enjoying a unique personalization effect and functional support.
Disadvantage of Root Redmi 9A
In some user’s cases, they have few times noticed that their handset wasn’t working the way it used to be, and lags and jester might frequently appear in the daily usage.
Despite having impressive features, some users have suffered that the battery life is dropping to the extend where you can’t even get screentime of 2~3 hours for work.
Magisk Update is not responsible for what happens to your phone. Do it at your own risk while carefully follow the guidelines and ask if you have any doubt regarding this matter. Download the correct TWRP according to your model.
How to Install TWRP Without Using PC
- Install the essential tools and TWRP custom recovery to move swiftly in future.
- Ensure to attain the latest version of the Magisk zip file using this guide, while the second thing you need to follow is the unlock bootloader section.
- You will need a secondary phone, and you have to purchase an OTG cable so that the secondary device can work as the PC and run basic commands.
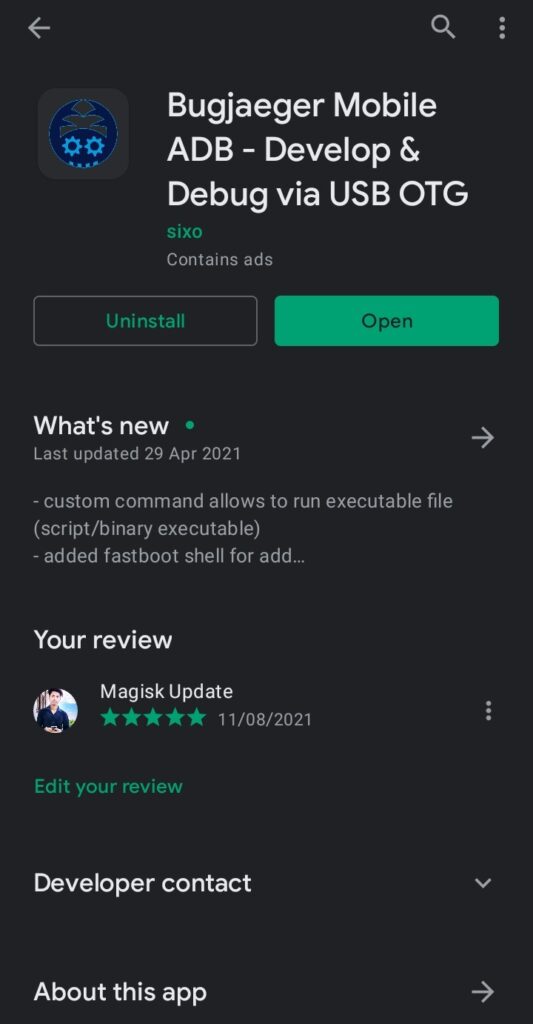
- Download and install the Bugjaeger ADB application into your Android phone.
- Make sure that the secondary device also has enabled USB debugging.
- Connect OTG into the secondary device while connecting the USB cable into the primary device. Plugin them accurately since everything depends on them.
- In the primary device, apply the Power + Volume down buttons combo once.
- From this combination, you will enter into the fastboot mode of your handset.
Note: I assume that you have download the respective TWRP file for your device!
- Head toward the Bugjaeger ADB application and press on the flash option.
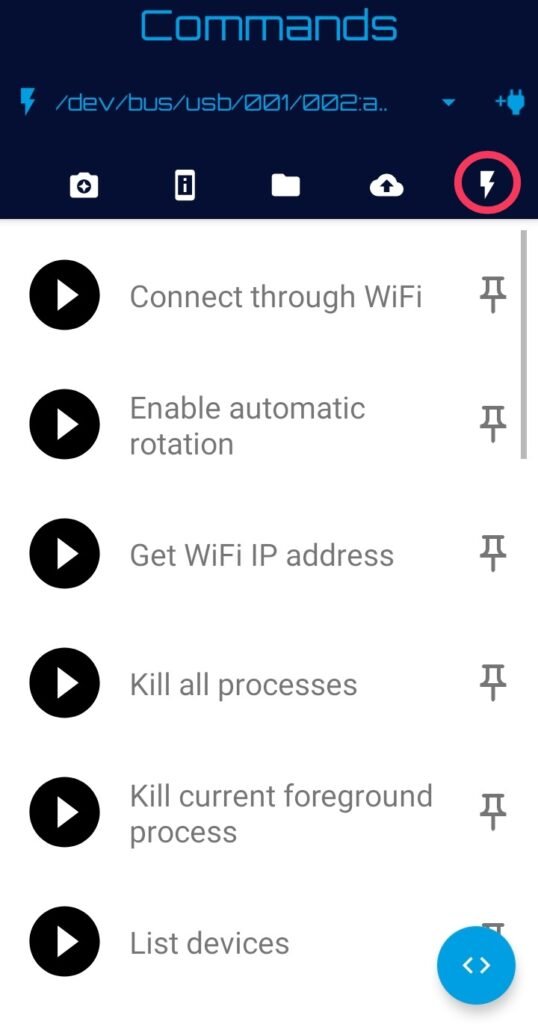
- You will notice the command prompt button in the below section of the screen.
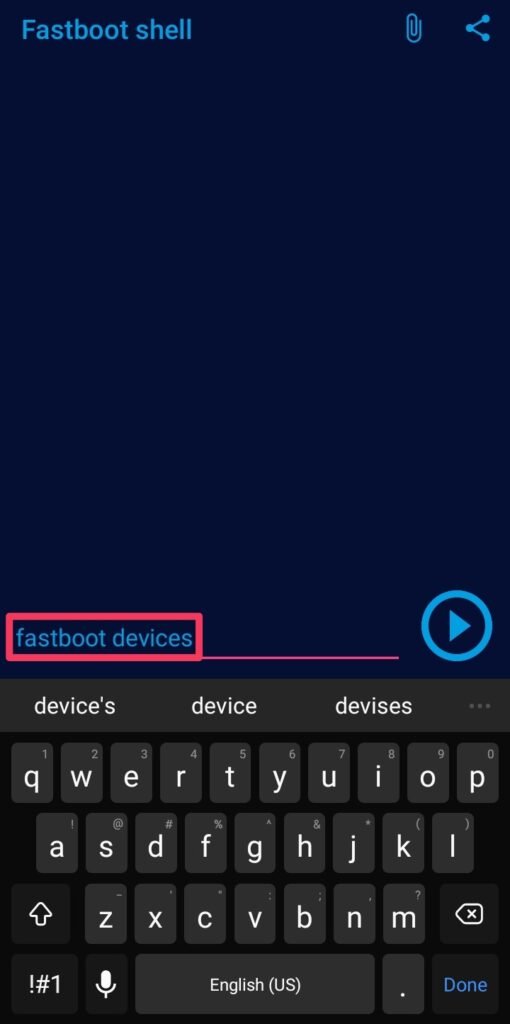
- Type command –fastboot devices – It will show that your device is connected.
- Type the second command –fastboot flash recovery– Make sure that you are entering the correct spelling, and after that, you have to attach the required file.
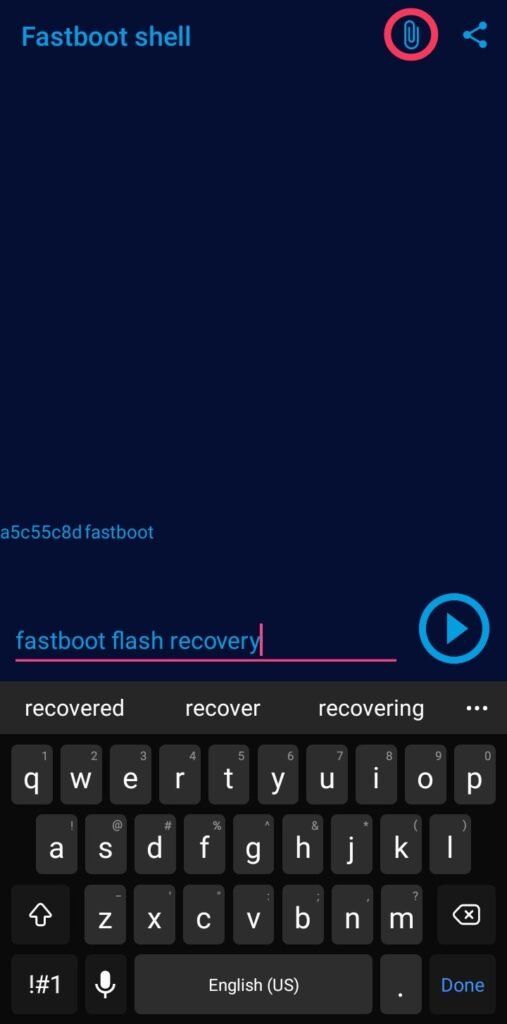
- Click on the attached file icon and navigate to the stored TWRP file location.
- Once you tap on the flashable file, it will appear in the command prompt.
- Now, press the play button to initialize the process of flashing the recovery.
- Once everything ends safe and sound—disconnected the primary device and boot into the custom recovery mode through the Volume Up + Power buttons.
How to Root Redmi 9A Using Magisk
- You have likely obtained the flashable zip file from the above section, right?
- Click on the Install section of the TWRP (Team Win Recovery Project) screen.
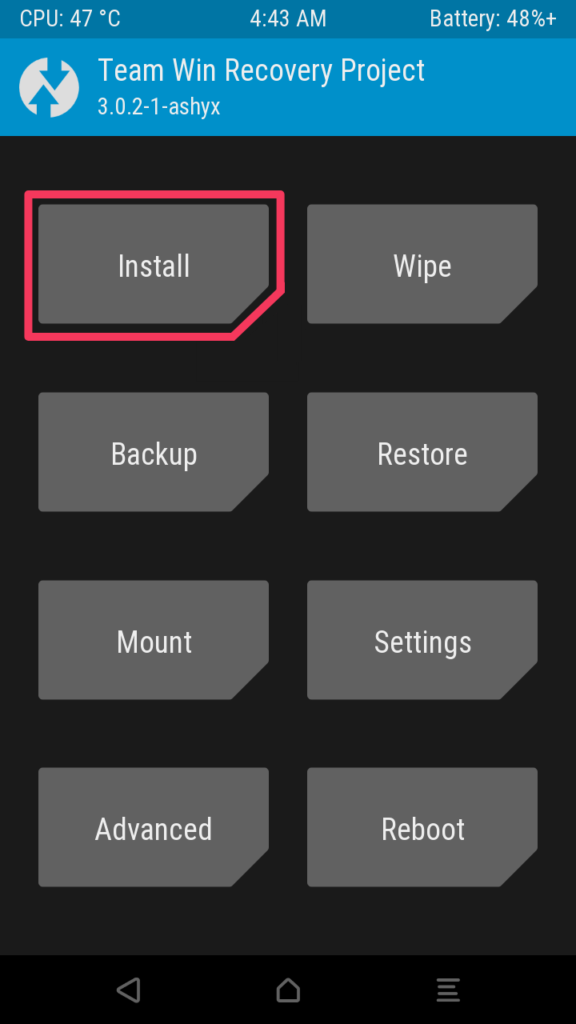
- Navigate to the Magisk zip folder and open the file into the internal storage.
- Once you will reach the file, tap on it while select storage starts to appear.
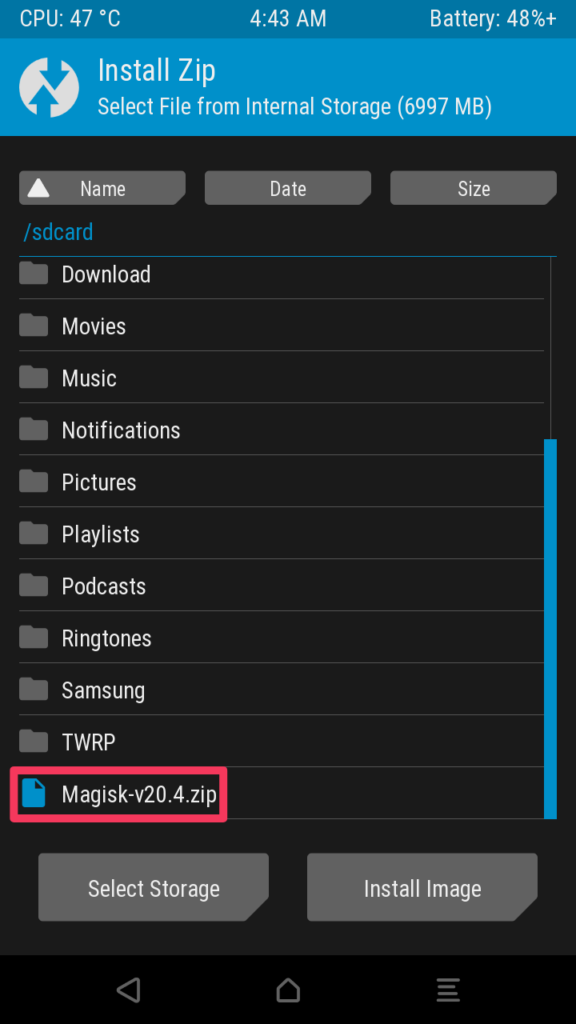
- Swipe right to complete the process. Afterward, reboot the device at last.
- Congratulation, you have finally unlocked those fascinating root privileges.
Related Article:
First, you can start with installing custom ROMs and improvising the overall interface setting to something that you prefer, but be aware of the risk factor at the same time.
If unsettling thoughts are clouding your mind, do let us know in the comment section to get subtle answers, and it will further also help us make this article better for you.