
How to Root Redmi Note 8 Pro Without PC
Are you bored with custom interface features? Or are you frequently bothered by the annoying bloatware and ads-notification! Then you have to root Redmi Note 8 Pro.
Now, it’s your time to discover those fascinating privileges and open the pathway to exciting settings from scratch while you can perform tons of other impressive things.
Following this, make sure to follow the guide precisely because there are hidden prick waiting for you. To start the journey, you have to understand the primary specs first.
This smartphone launched in the Indian market on 17th September 2019. Talking about camera sensor 64MP + 8MP + 2MP + 2MP quad primary setup. MediaTek Helio G90T processor powers redmi note 8 pro with 6GB Ram and 128GB storage. The smartphone was coming— with 6.53 inches (16.59 cm) 395 PPI, IPS LCD. We are moving to battery performance is 4500 mAh, USB Type-C Port with Fast Charging before starting the guide. Let’s understand what root is!
What is Root?
The magisk app is popular slang for root access. You perform specific steps to open the system partition settings blocked before by smartphone makers in a simple term.
In addition to that, you can efficiently optimize the entire Android phone ecosystem according to your desire and create a personalized interface with advanced settings.
Now, what remains is that you are willing to take the initial risk to overcome the limitation; you want it, isn’t that right? Thus, let’s understand the pros and the cons.
Here are some Points to Remember while Rooting
- Ensure your smartphone bootloader has unlocked. You can also follow our guide to unlocking the bootloader on any Xiaomi phone.
- We recommend that your smartphone battery has been charged more than 40% because a lot of time required for the rooting procedure.
Advantage of Root Redmi Note 8 Pro
Equipping various types of settings and custom functions; moreover, there are tons of things available online that will aid your dream to create a personalized OS system.
The rooting privileges permit you to test out the operating system beta version plus provide faster updates and exciting features that you might have never seen before.
Disadvantage of Root Redmi Note 8 Pro
You can effortlessly attain fascinating things with root ecosystem, but at the same time, you are also closing the door of warranty permits provided by company officials.
In some typical cases, users have discovered that smartphone workability speed is backlashing and showing lags once they install random software with accurate info.
Magisk Update is not responsible for what happens to your phone. Do it at your own risk while carefully follow the guidelines and ask if you have any doubt regarding this matter. Download the correct TWRP according to your model.
How to Install TWRP Without Using PC
- Install the essential tools and TWRP custom recovery to move swiftly in future.
- Ensure to attain the latest version of the Magisk zip file using this guide, while the second thing you need to follow is the unlock bootloader section.
- You will need a secondary phone, and you have to purchase an OTG cable so that the secondary device can work as the PC and run basic commands.
- Download and install the Bugjaeger ADB application into your Android phone.
- Make sure that the secondary device also has enabled USB debugging.
- Connect OTG into the secondary device while connecting the USB cable into the primary device. Plugin them accurately since everything depends on them.
- In the primary device, apply the Power + Volume down buttons combo once.
- From this combination, you will enter into the fastboot mode of your handset.
Note: I assume that you have download the respective TWRP file for your device!
- Head toward the Bugjaeger ADB application and press on the flash option.
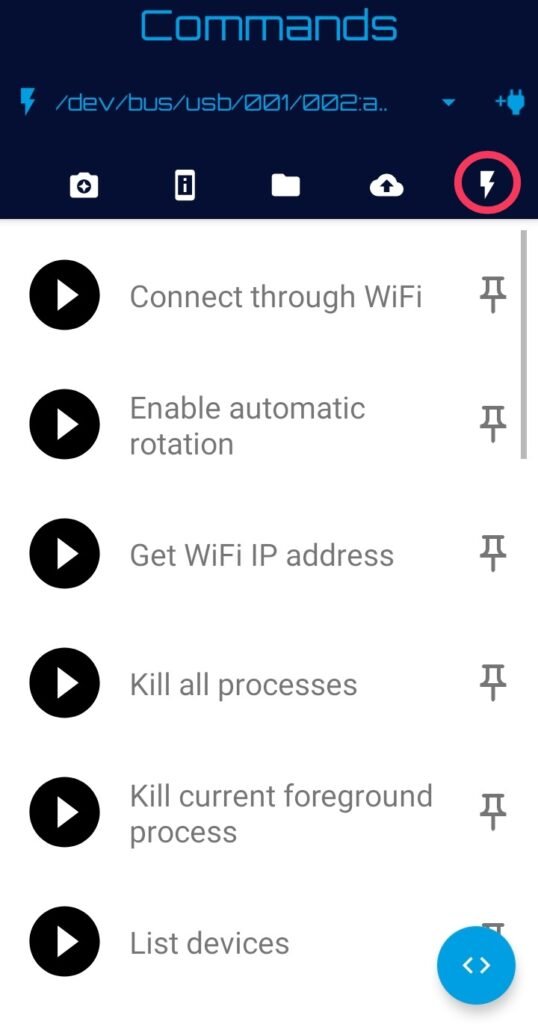
- You will notice the command prompt button in the below section of the screen.
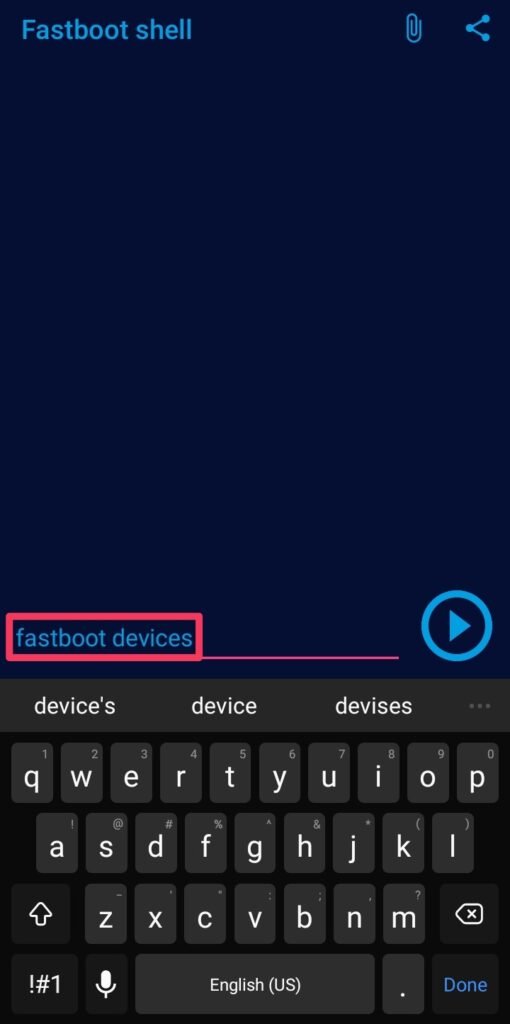
- Type command –fastboot devices – It will show that your device is connected.
- Type the second command –fastboot flash recovery– Make sure that you are entering the correct spelling, and after that, you have to attach the required file.
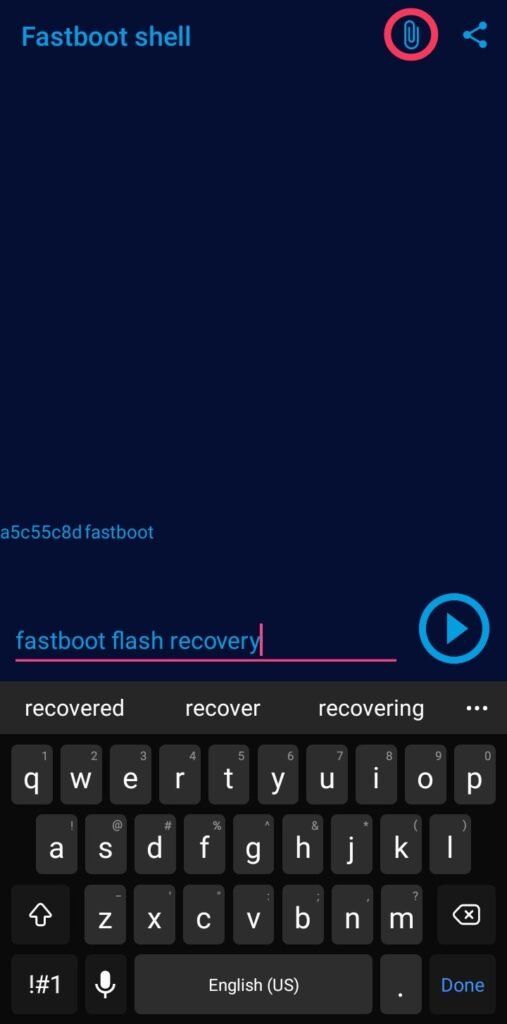
- Click on the attached file icon and navigate to the stored TWRP file location.
- Once you tap on the flashable file, it will appear in the command prompt.
- Now, press the play button to initialize the process of flashing the recovery.
- Once everything ends safe and sound—disconnected the primary device and boot into the custom recovery mode through the Volume Up + Power buttons.
How to Root Redmi Note 8 Pro Using Magisk
- You have likely obtained the flashable zip file from the above section, right?
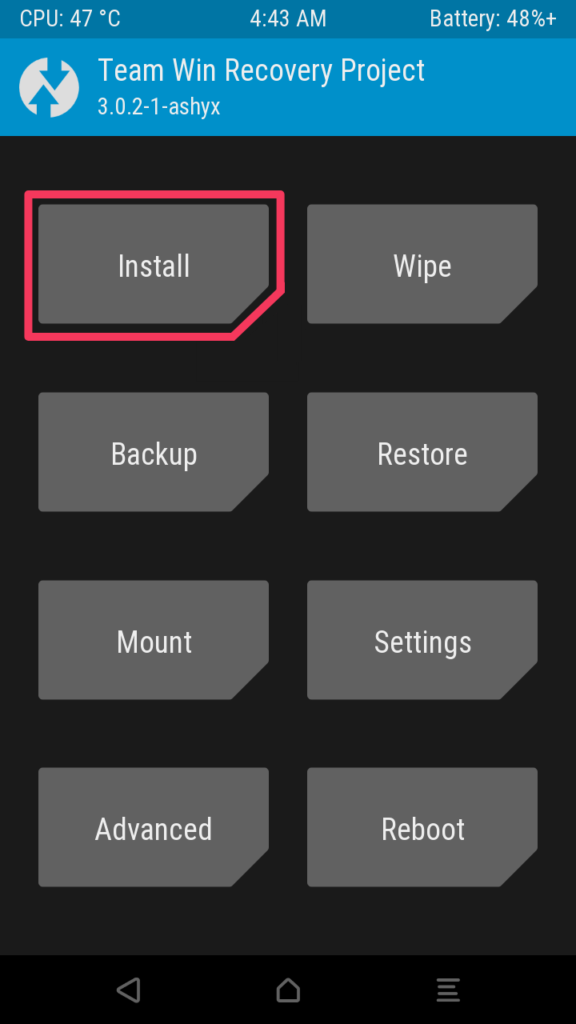
- Click on the Install section of the TWRP (Team Win Recovery Project) screen.
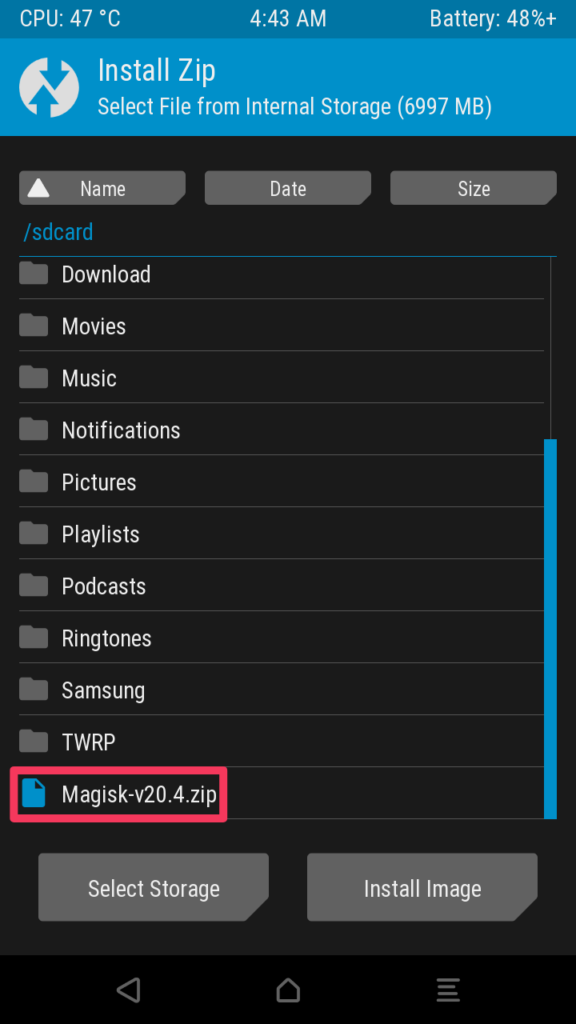
- Navigate to the Magisk zip folder and open the file into the internal storage.
- Once you will reach the file, tap on it while select storage starts to appear.
- Swipe right to complete the process. Afterward, reboot the device at last.
- Congratulation, you have finally unlocked those fascinating root privileges.
Related Article:
What are you waiting for? Test out everything you have always dreamt for long time, enjoy the custom features, and review software to avoid risk factors for better results.
You didn’t have to worry about anything with the latest magisk app; while it looks like we have come near conclude, ask out if something is bothering you in the below spot.


Where is the link for Recovery.img
You will get the recovery link in the disclaimer section.