How to Root Realme 9i Without PC [Working]
Desire to unlock the true power of your phone? The path is to get the root Realme 9i guide to unleashing robust customization features, all according to your requirements.
In this post, you will obtain everything from scratch that allows you to cross the limits and quickly receive the fascinating privileges of rooting without wasting much time.
Besides, you might have known that you will need several standalone applications to complete the process, so make sure to get all the essential stuff before getting started.
Rooting allows numerous things. It includes adding new UI skins to entirely transform the internal system to just building an attractive ecosystem, which is quite stunning.
On top of that, you can try out various custom ROM layering to receive a personalized experience, and all you need to initiate is by unlocking the phone’s bootloader settings.
Are you excited to know more about rooting? Yes, you want to exceed the phone limits and perform something great. So, let’s start with understanding what root means!
What is Root?
Root in the primary section where all the user’s and system data are stored, accessed through the administer directory that controls the data flow in the entire ecosystem.
While the tech users, like us, are looking for diverse methods to gain system access, in other words, to administer settings to unlock special root privileges at your fingertips.
However, you might face a few consequences if you unlock those settings. As a rooted device comes with helpful and harmful characteristics, let’s see both sides of the coin.
Advantages of Root Realme 9i
For starters, you can flash different files, custom recoveries, ROMs, update OS faster, modify the current settings, and many more things are available for the users too.
Still, the best power is to further boost the overall battery endurance and level up the gameplay experience with immersive overclocking and underclocking software help.
Disadvantages of Root Realme 9i
The device will become more vulnerable to harmful viruses, malware, and spyware as the security barrier put by the official makers has been lifted after rooting the handset.
The same story applies to the warranty since flashing rooting files are considered a violation of the maker’s policies so that you won’t gain particular warranty privileges.
Before You Start
- Firstly, you are required to save your old data and backup it in a secure place.
- The next thing you require to do is unlock bootloader on any realme phone.
- Ensure that the phone is fueled correctly. More than 60% battery life is needed.
- If you are rooting a handset without a computer, you will require a secondary smartphone to aid access the ADB and fastboot command in the latter parts.
How to Root Realme 9i Using Magisk
Disclaimer: Magisk Uptade is not accountable for any harm to the user’s device. Moreover, there’s a risk of bootloop or brick, and if you are aware of that, move forward. If you want to perform the method thoroughly, fill in the requirements.
Download required files
- Download the latest TWRP custom recovery according to your model name.
- After downloading the TWRP to your device, put the device is in fastboot mode.
- Check out the device fastboot pattern. Usually, it’s the Volume Up + Power key.
- Afterward, you have to download the Bugjaeger app on the secondary phone and connect both devices with an OTG cable to flash the TWRP file quickly.
Note: Confirm that you have to transfer the TWRP files on the secondary smartphone!
Install TWRP recovery without pc
- Enter the Bugjaeger ADB commands app and head toward the flash section.
- Tap on the flash section and enter the first command – fastboot devices – first.
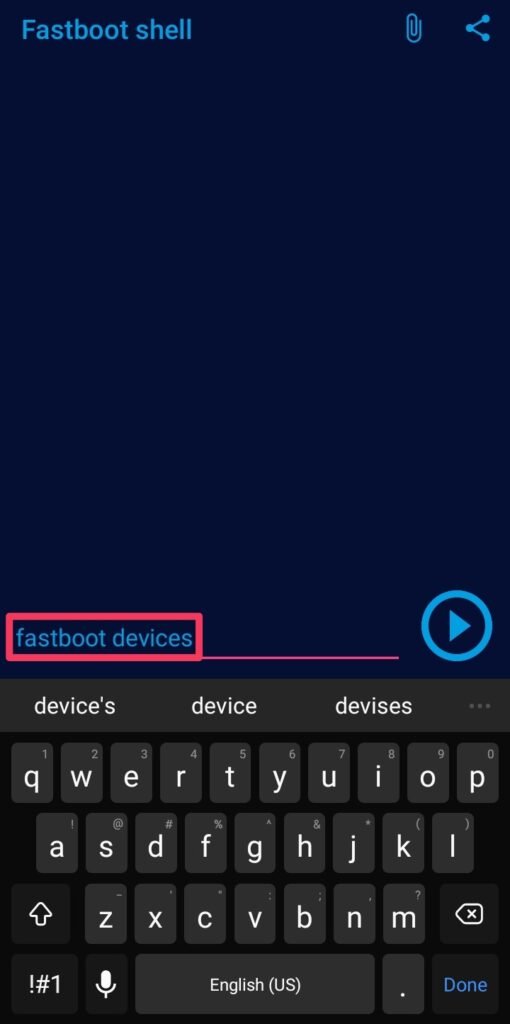
- This command will show that your device is connected to the secondary phone.
- Next, you have to enter – fastboot flash recovery – command to flash recovery.
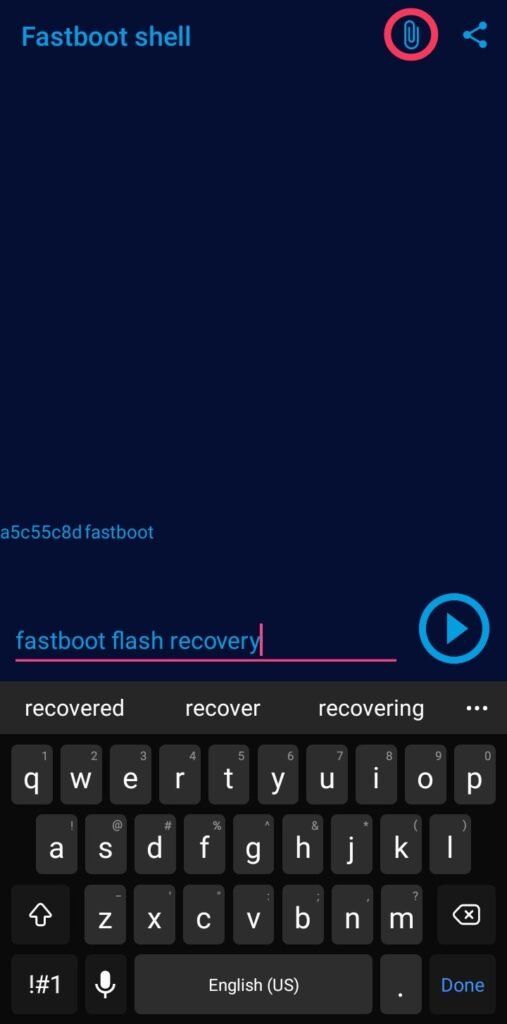
- After writing this, go to the Add file option and navigate the TWRP file location. Select the flashable zip file to continue the process further in a simple manner.
- Tap on Play button to install custom recovery. Wait for the completion process.
Finally, root your android phone
- Download the Magisk zip file to get started to unleash those exciting features.
- Long press the Power + Volume down button combo to boot into TWRP mode.
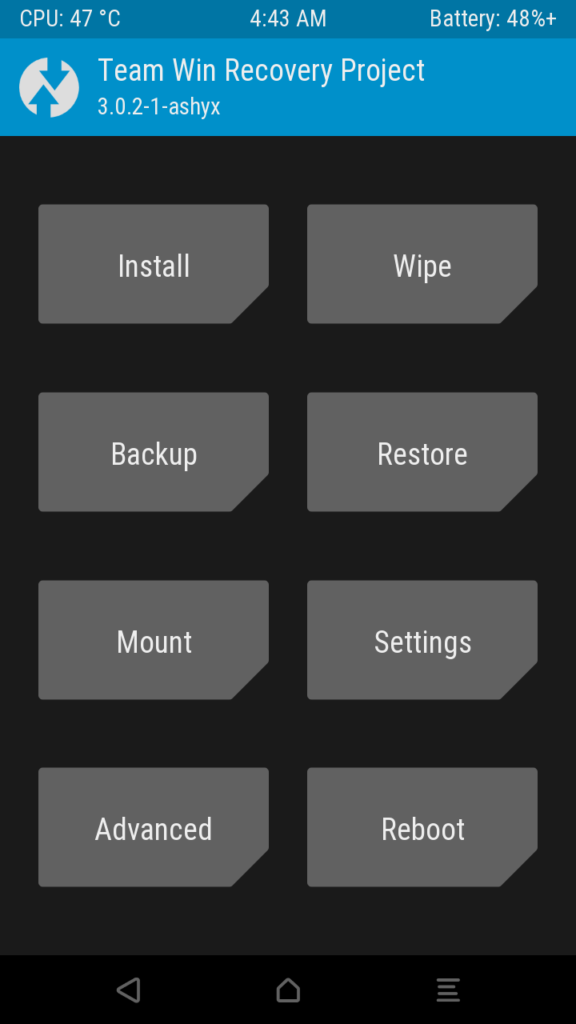
- Tap on the Install option and go to the magisk location in the internal storage.
- Click on that zip file and “swipe to confirm flash” to start the flashing process.

- Afterward, download the latest Magisk app to review whether those privileges are unlocked to you. If not, attempt to reflash the zip file to get better results.
Related Article:
Finally, you have come across the end, and I hope you have unlocked those luxurious features for your phone. Now, wander around and enjoy those exciting features easily.
Last but not least, you should check out our telegram group, where we often discuss rooting phones there. If you are facing any issues, comment down or visit our group.