How to Root Redmi 7A – Two Easy Methods!
Do you crave to root Redmi 7A? If yes, my friend, I am happy to disclose that you have landed in the right place to complete your desire to transform the system settings files.
Even if you are a newbie and didn’t know how the tools serve, worry not as we have covered everything necessary to understand for first-timer rooters; read it till the end.
However, the software setup you need to install would understand better once you grasp the knowledge of the primary specs aspect that will assist you in the later part.
This smartphone launched in the Indian market on 22nd May 2019. Talking about camera sensor 12MP primary camera setup. Qualcomm Snapdragon 439 processor power Redmi 7A with 2GB Ram and 16GB storage. The smartphone was coming— with 5.45 inches (13.84 cm) 295 PPI, IPS LCD. We are moving to battery performance is 4000 mAh before starting the guide. Let’s understand what root is!
What is Root?
The root directory is a primary section that holds your important data—including the admin-level data and privileges. The firewall security usually seals off this portion.
In a typical case, users head toward gaining root access when they want to achieve something different from the standard with many customization features.
In most cases, that would be a wishful plan, but you also must be aware of the dark corner since the damage could be severe; thus, let’s witness the pros and cons traits.
Pre-Requisites
- Ensure your smartphone bootloader has unlocked. You can also follow our guide to unlocking the bootloader on any Xiaomi phone.
- You can not do anything about the data stored inside the internal storage once the rooting process starts. Please, take backup data before.
Advantages of Root Redmi 7A
Boost your smartphone battery performance to several folds, plus unlocks immersive screentime to watch and stream your favorite content online without any trouble.
In terms of custom features, you equip different ROMs to build a unique personalized interface ecosystem that only works according to your wish while providing support.
Disadvantages of Root Redmi 7A
Rooting your phone was never secure as it violates warranty, and malicious malware can also attack. Yet, the worst would be that it can make the device a useless brick.
Smartphones usually have heating problems, but this issue can be increased up to an alarming rate and torment the device’s internal hardware without any prior notice.
Magisk Update is not responsible for what happens to your phone. Do it at your own risk while carefully following the guidelines and asking if you have any doubt regarding this matter. Download the correct TWRP according to your model.
How to Install TWRP Without Using PC
- Install the essential tools and TWRP custom recovery to move swiftly in future.
- Ensure to attain the latest version of the Magisk zip file using this guide, while the second thing you need to follow is the unlock bootloader section.
- You will need a secondary phone, and you have to purchase an OTG cable so that the secondary device can work as the PC and run basic commands.
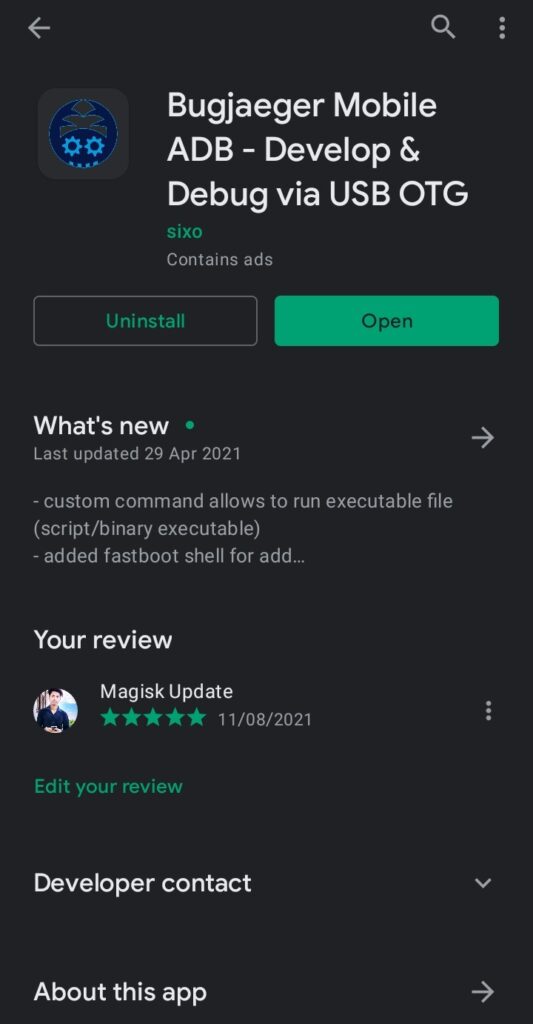
- Download and install the Bugjaeger ADB application on your Android phone.
- Make sure that the secondary device also has enabled USB debugging.
- Connect OTG to the secondary device while connecting the USB cable into the primary device. Plugin them accurately since everything depends on them.
- Apply the Power + Volume down buttons combo once in the primary device.
- From this combination, you will enter into the fastboot mode of your handset.
Note: I assume that you have download the respective TWRP file for your device!
- Head toward the Bugjaeger ADB application and press on the flash option.
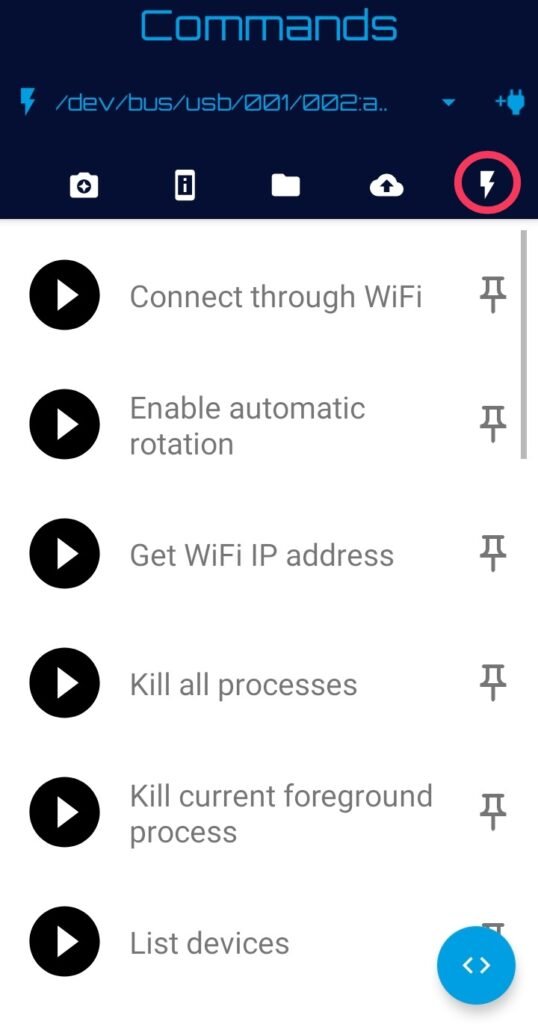
- You will notice the command prompt button in the below section of the screen.
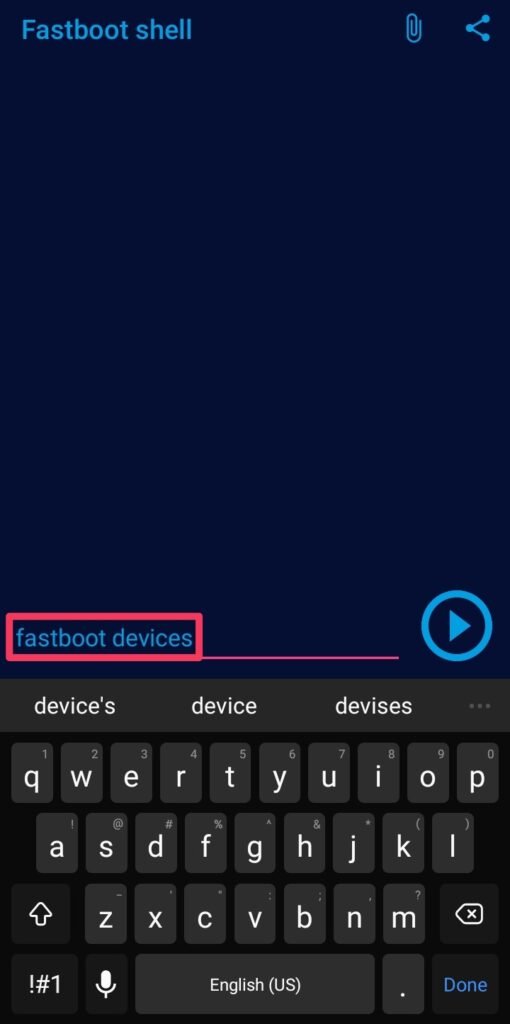
- Type command –fastboot devices – It will show that your device is connected.
- Type the second command –fastboot flash recovery– Make sure that you are entering the correct spelling, and after that, you have to attach the required file.
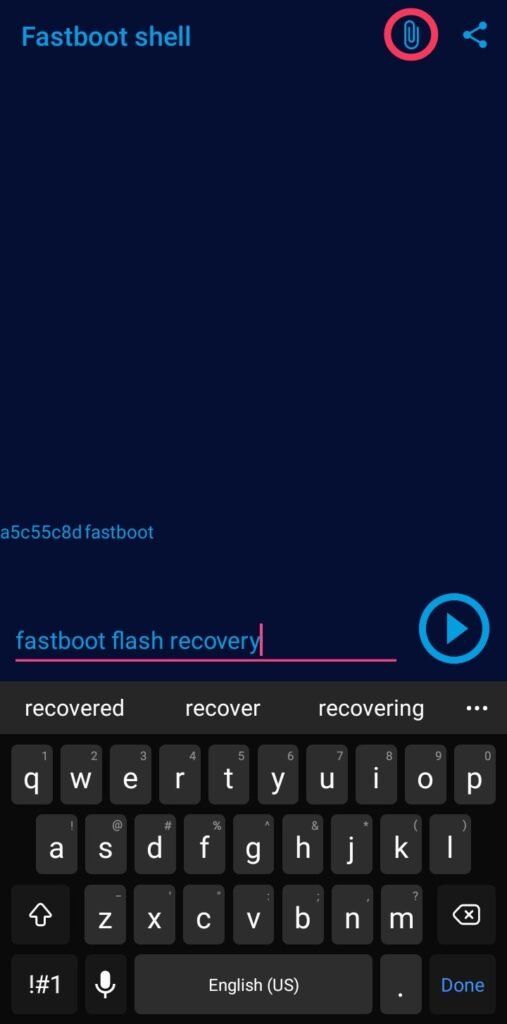
- Click on the attached file icon and navigate to the stored TWRP file location.
- Once you tap on the flashable file, it will appear in the command prompt.
- Now, press the play button to initialize the process of flashing the recovery.
- Once everything ends safe and sound—disconnected the primary device and boot into the custom recovery mode through the Volume Up + Power buttons.
Method#1: Root Redmi 7A Using Magisk
- You have likely obtained the flashable zip file from the above section, right?
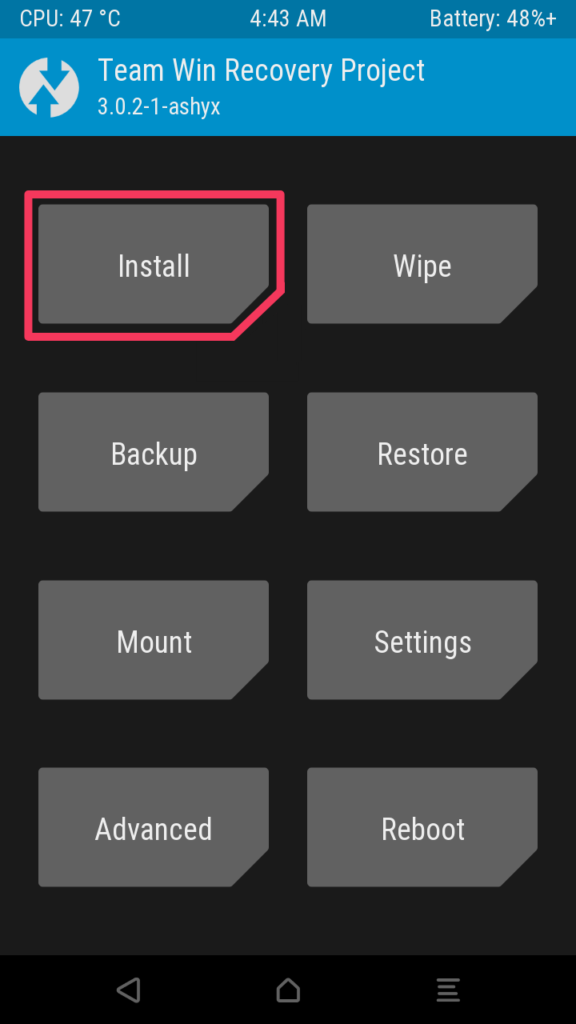
- Click on the Install section of the TWRP (Team Win Recovery Project) screen.
- Navigate to the Magisk zip folder and open the file into the internal storage.
- Once you will reach the file, tap on it while select storage starts to appear.
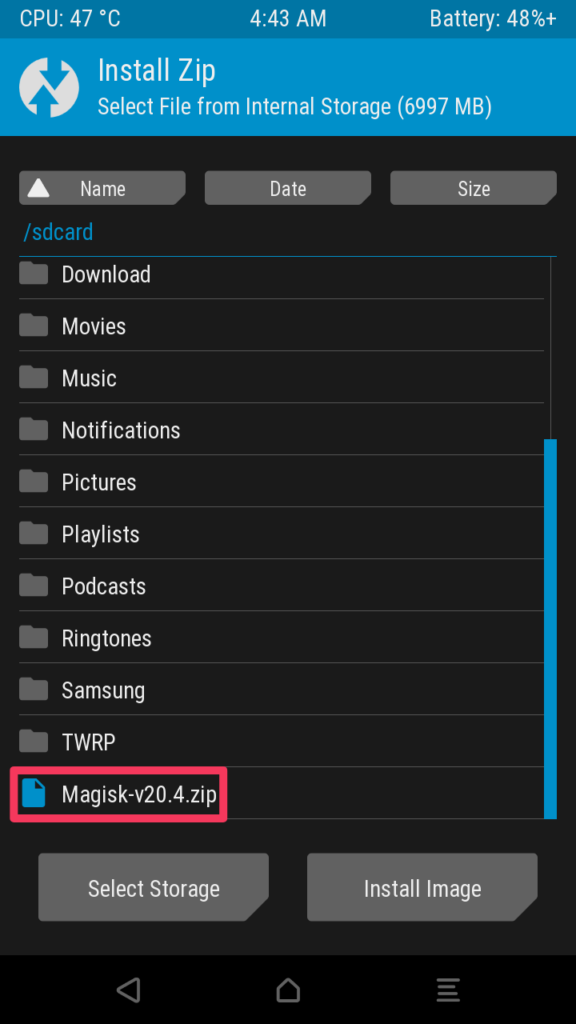
- Swipe right to complete the process. Afterward, reboot the device at last.
- Congratulation, you have finally unlocked those fascinating root privileges.
Method#2: Root Redmi 7A Using KingRoot
If you are looking for a method that root Android phones without a PC, the KingRoot is the solution for that, you didn’t need an additional resource package to start.
- First of all, get the latest version of the KingRoot apk.
- Download and install on the KingRoot apk over your phone.
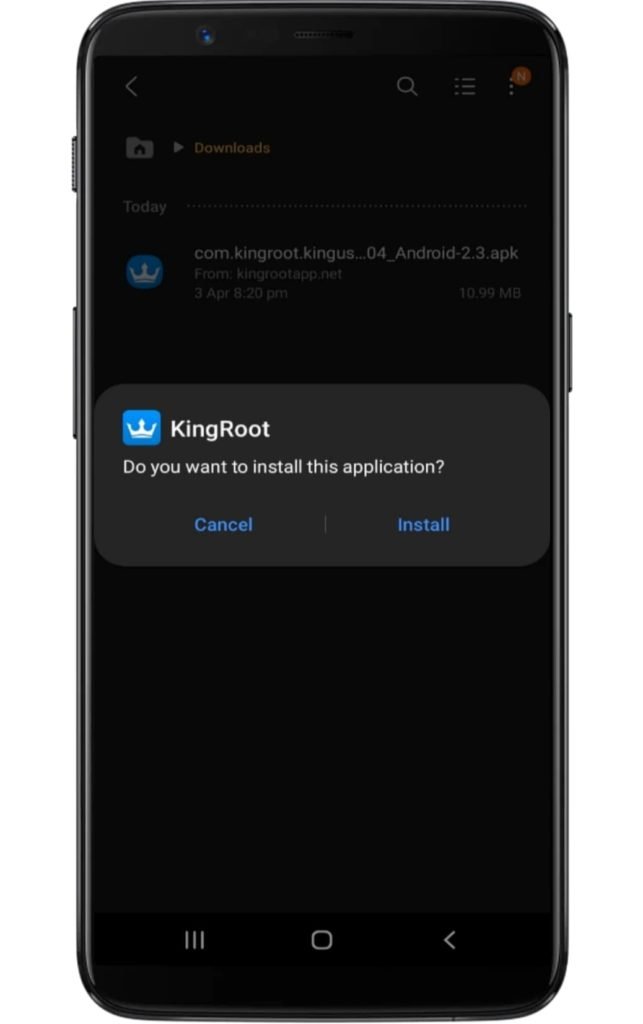
- Make sure you have enabled the unknown source option.
- Access the application and tap on the “Try Root” button.
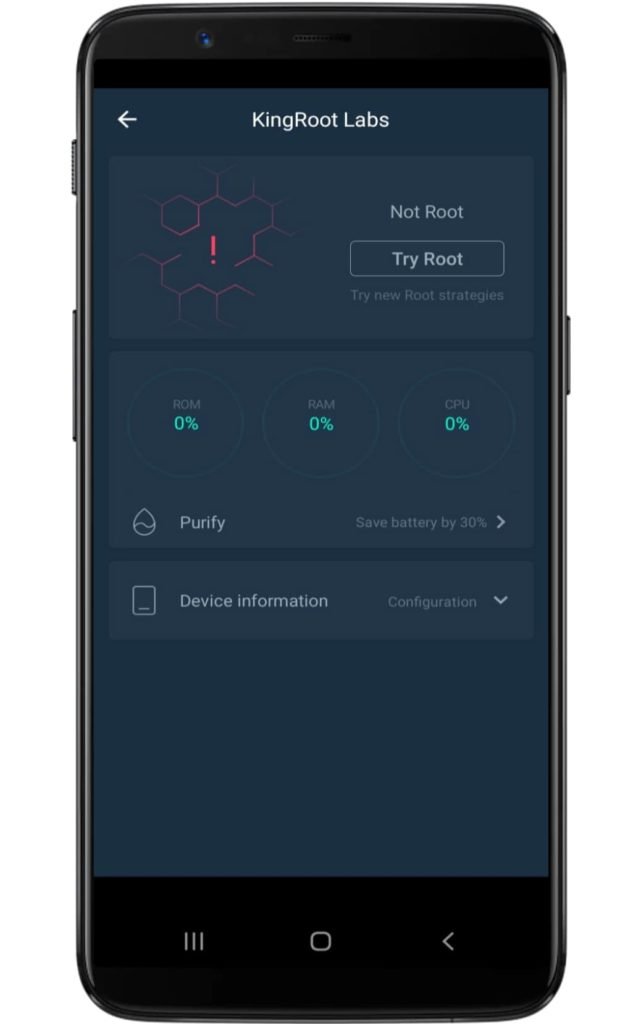
- Now several booting starts to take place, so don’t worry!
- Lastly, your device will be successfully rooted.
Related Article:
Now that you have attained the hidden powers. Wander around, pick the best ROMs, and utilize them as much as you can. Also, remove bloatware from the ecosystem.
However, if you encounter a problem while following this guide, let us briefly know about it in the upcoming section. Meanwhile, I hope you have a safe journey ahead!